4.1. Create Cyclecloud CMAQ Cluster#
Documentation for Azure CycleCloud Documentation
4.1.1. Configure the Cycle Cloud Application Host using the Azure Portal#
Log into the Azure Portal
In the search bar, enter “Marketplace”, Click on Marketplace Icon.
In the Marketplace search bar, enter “CycleCloud”.
Click on the heart in the Azure CycleCloud box to add this as a favorite resource.
Use the Create pulldown menu to select Azure CycleCloud 8.6
4.1.2. Customize your Host Virtual Machine for the CycleCloud Application#
Choose your Subscription
Select or create a new Resource Group that your CycleCloud instance will run in: note, leave this blank initially, as it will be named after the instance name below by appending _group to the instance name
Name your CycleCloud instance using Virtual Machine name : example name: CycleCloudHost
Select Region: example name: US East
Verify Image is Azure CycleCloud 8.6 - x64 Gen2
Select Size, click on see all sizes, enter D4s into the search button and select Standard_D4s_v3- 4cpus, 16GiB memory ($140.16/month)
Select Authentication Type
SSH public keyCreate the Username that you will use to log into the instance: example name: azureuser
SSH public key source - select
Generate new key pairSelect the Management tab and enable
System assigned managed identityClick on the
Reviewbutton and then theCreatebutton
When a pop-up menu is displayed: click on option to Download private key and create resource.
You will see a message ... Deployment is in progress
Wait until the resource has been deployed before proceeding to the next step.
Figure 1. Create a virtual Machine - Customize Host Virtual Machine Note: this virtual machine will be used to host the CycleCloud Application that is used to create the Cycle Cloud Cluster from it’s Web located at: UI https://IP-address/home
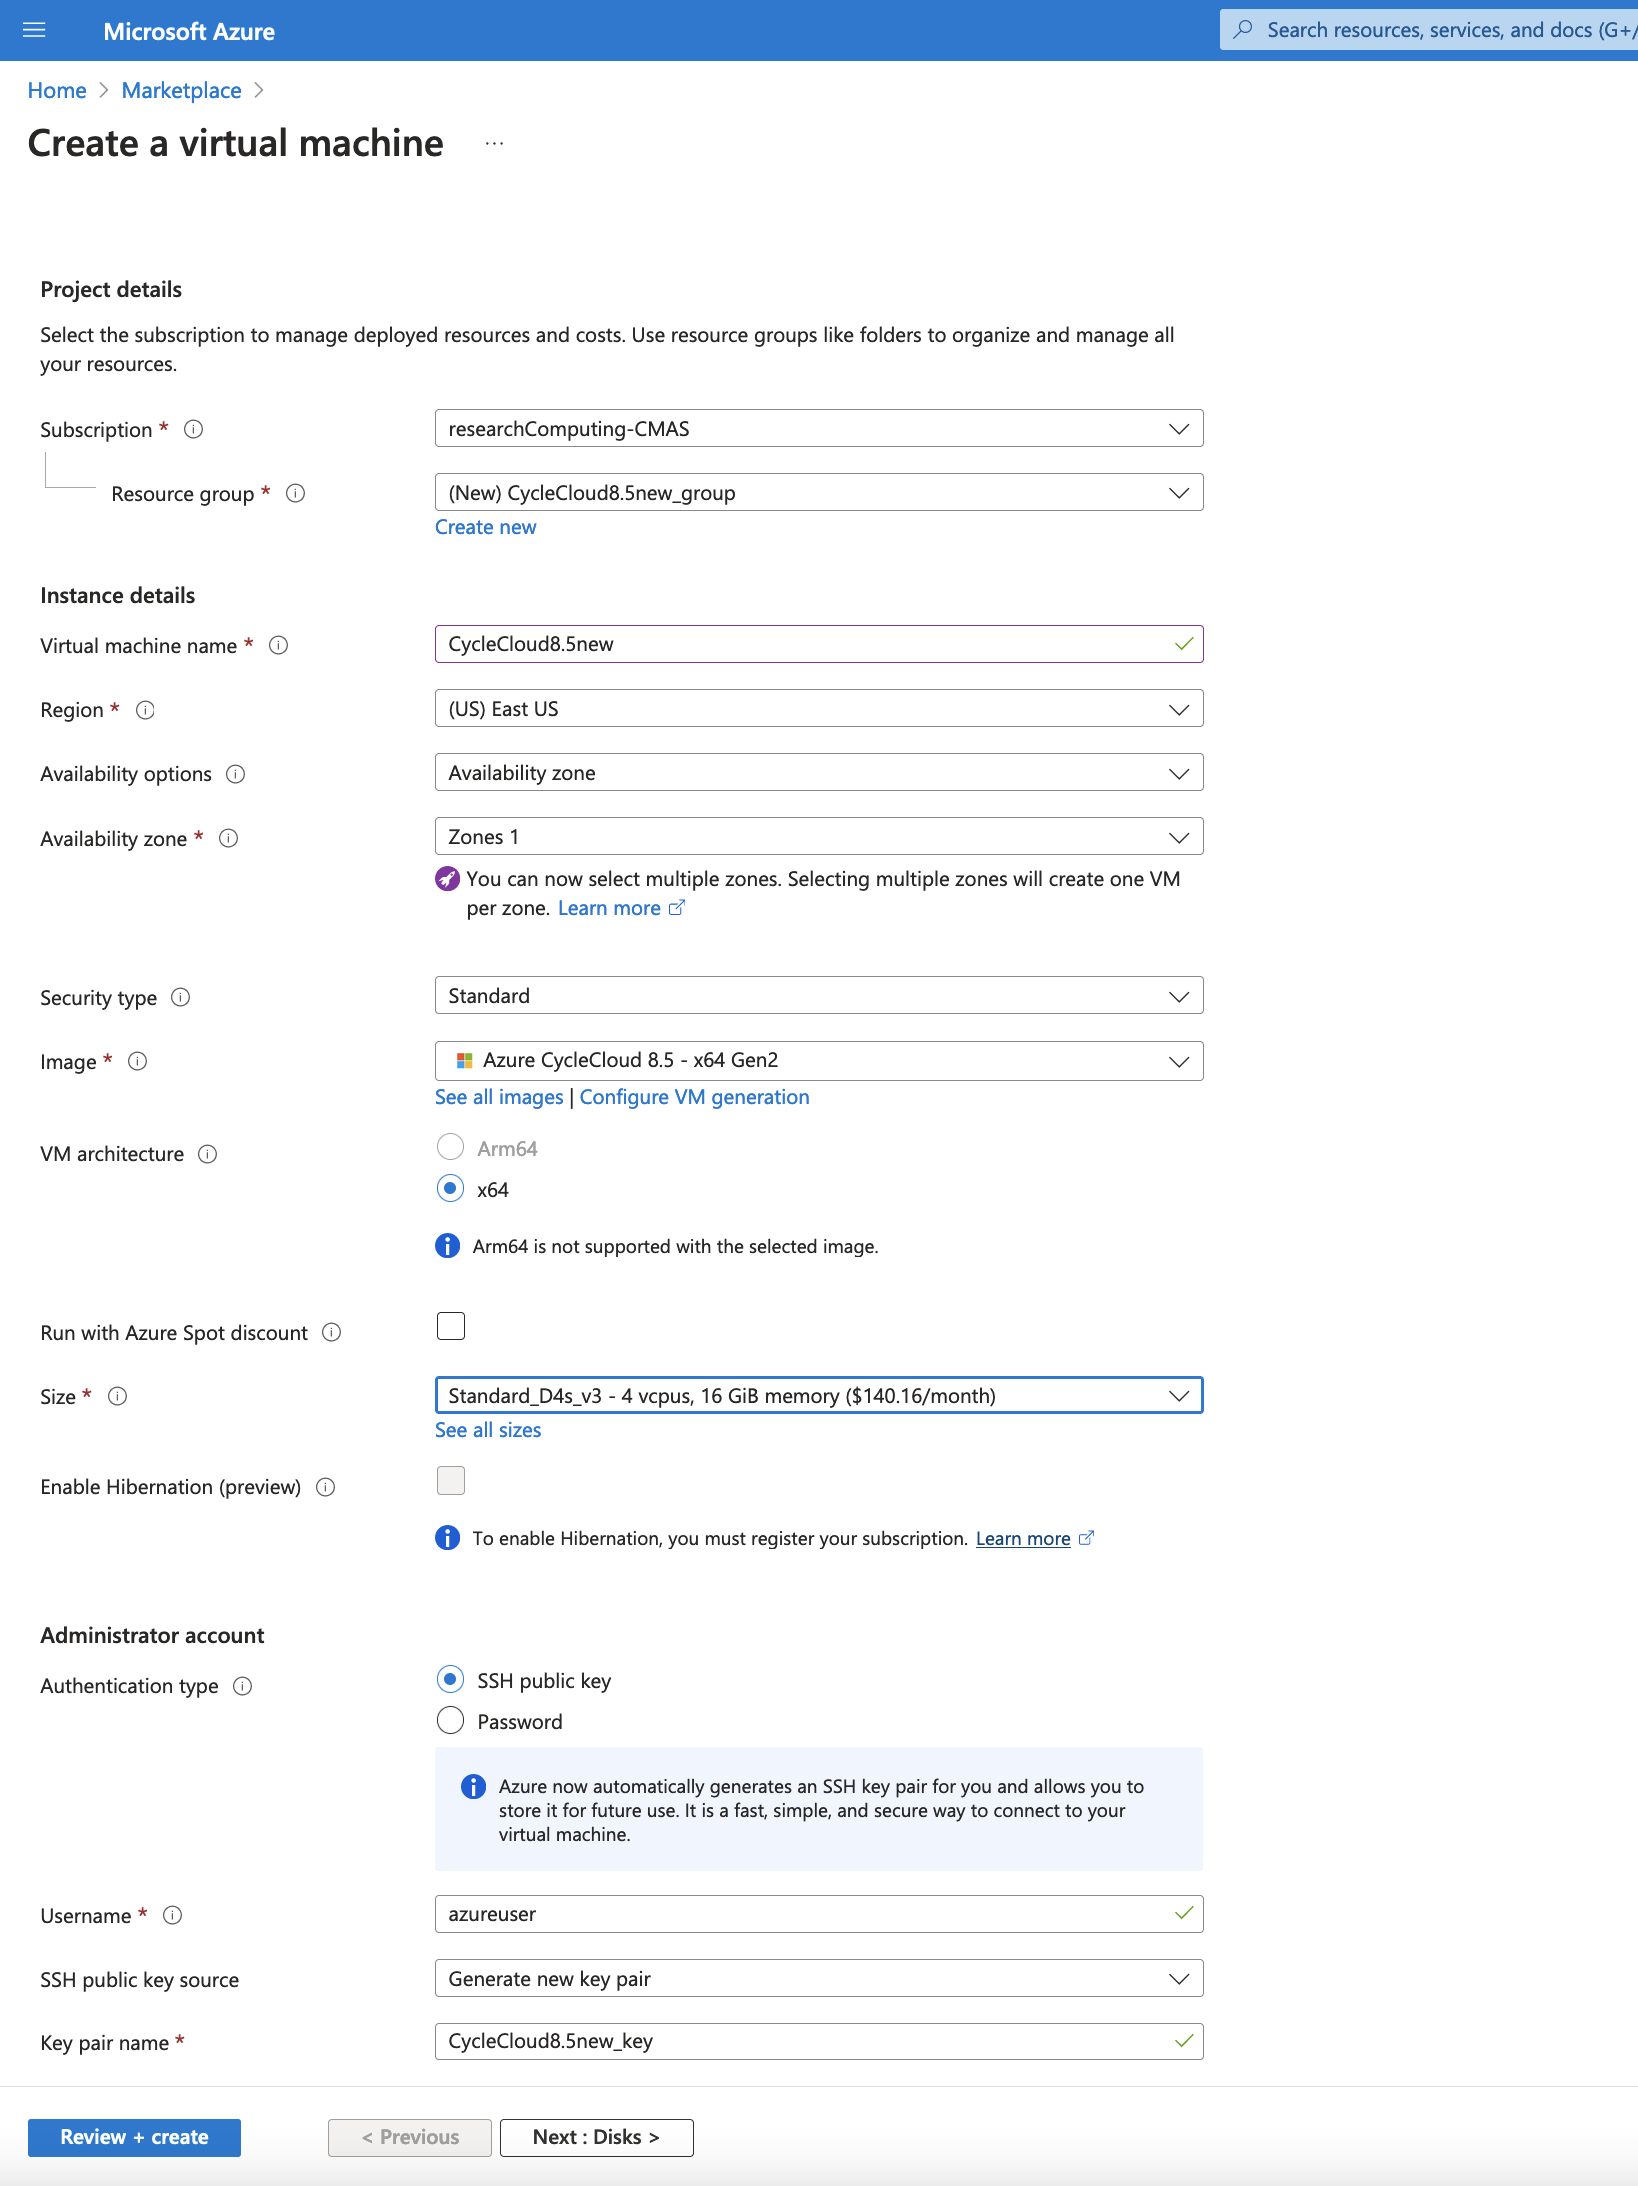
Figure 2. Select Disks for the Azure Virtual Machine - use default options
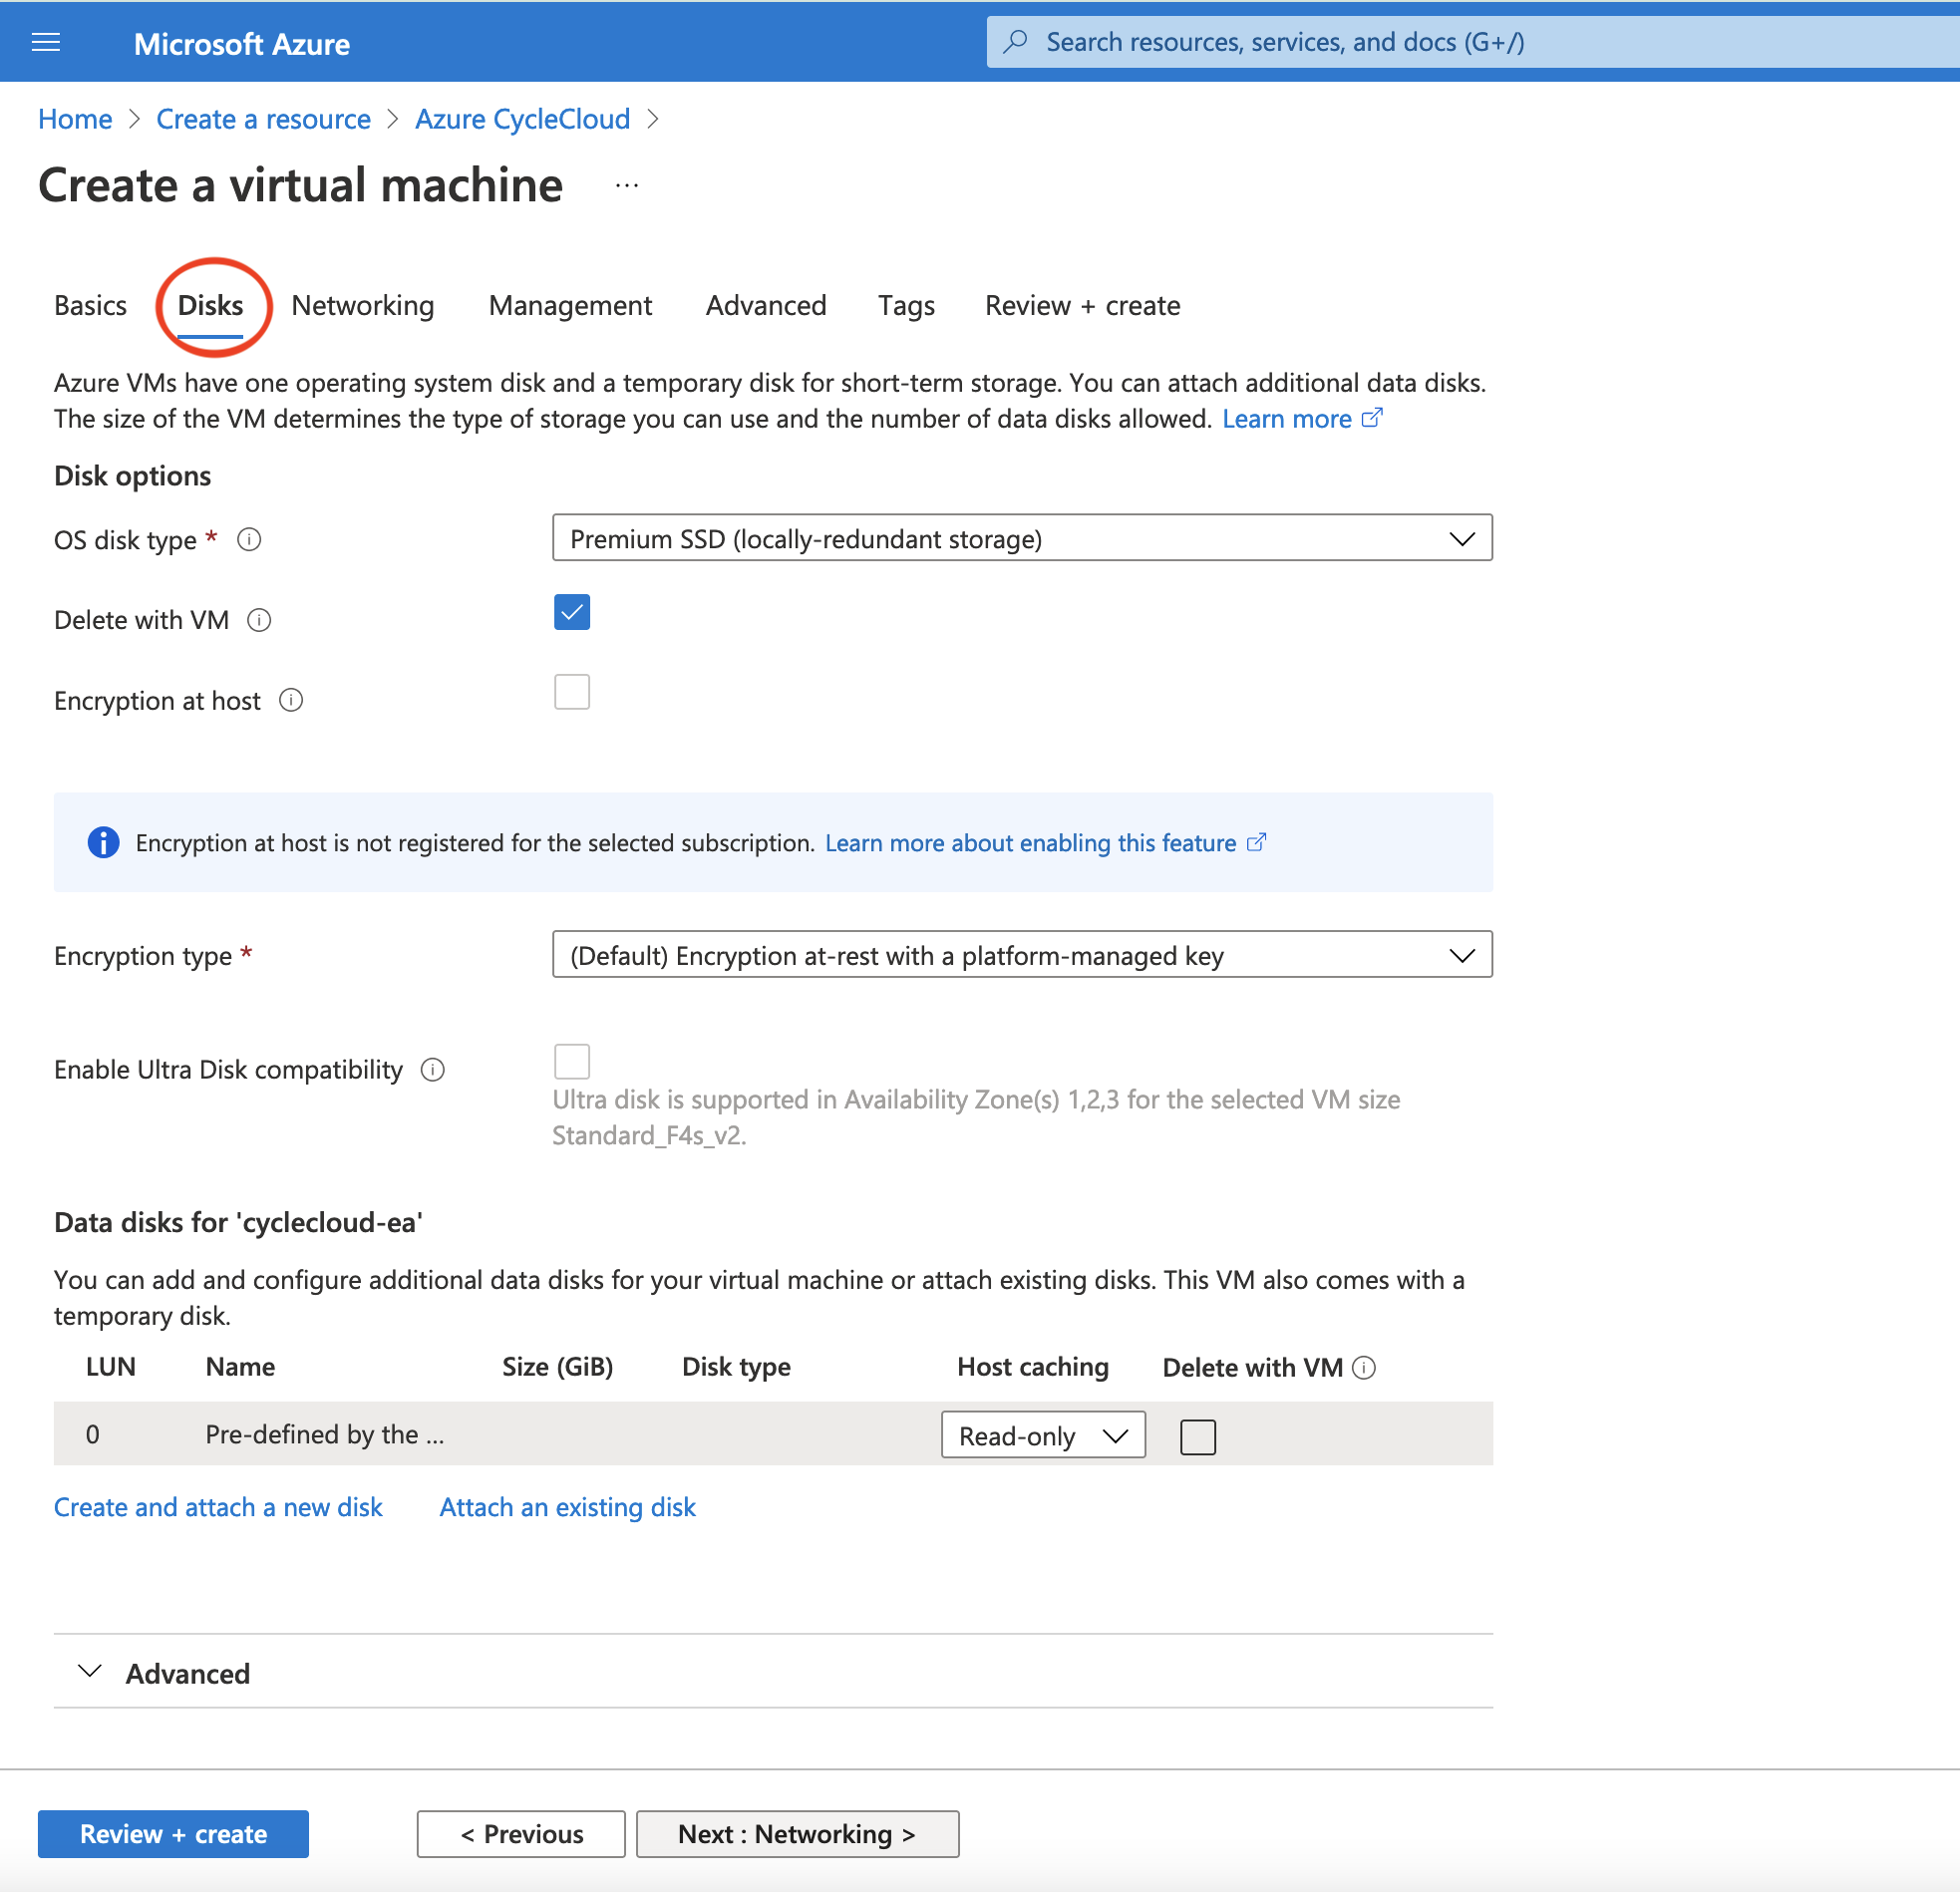
Figure 3. Select Network Interface for the Azure Virtual Machine - use default options
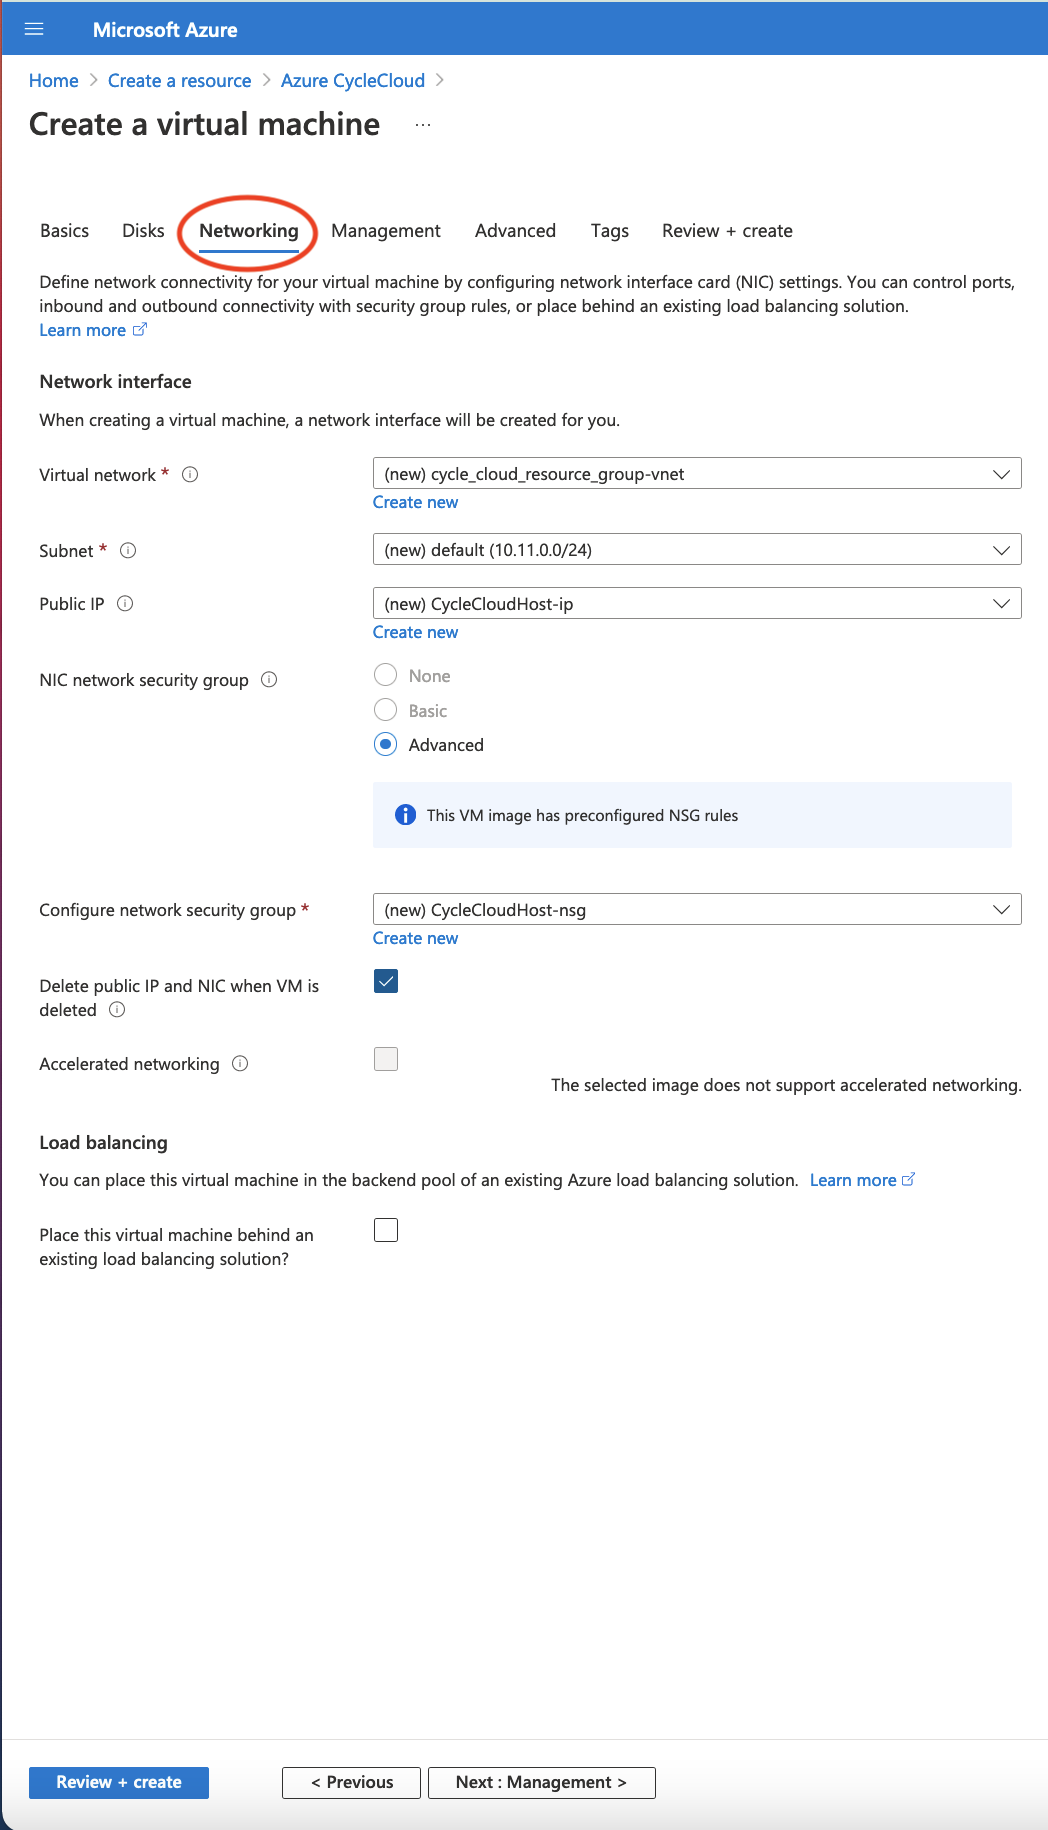
Figure 4. Select System assigned Managed Identity

Figure 5. Create a Virtual Machine - Deployment is in Progress
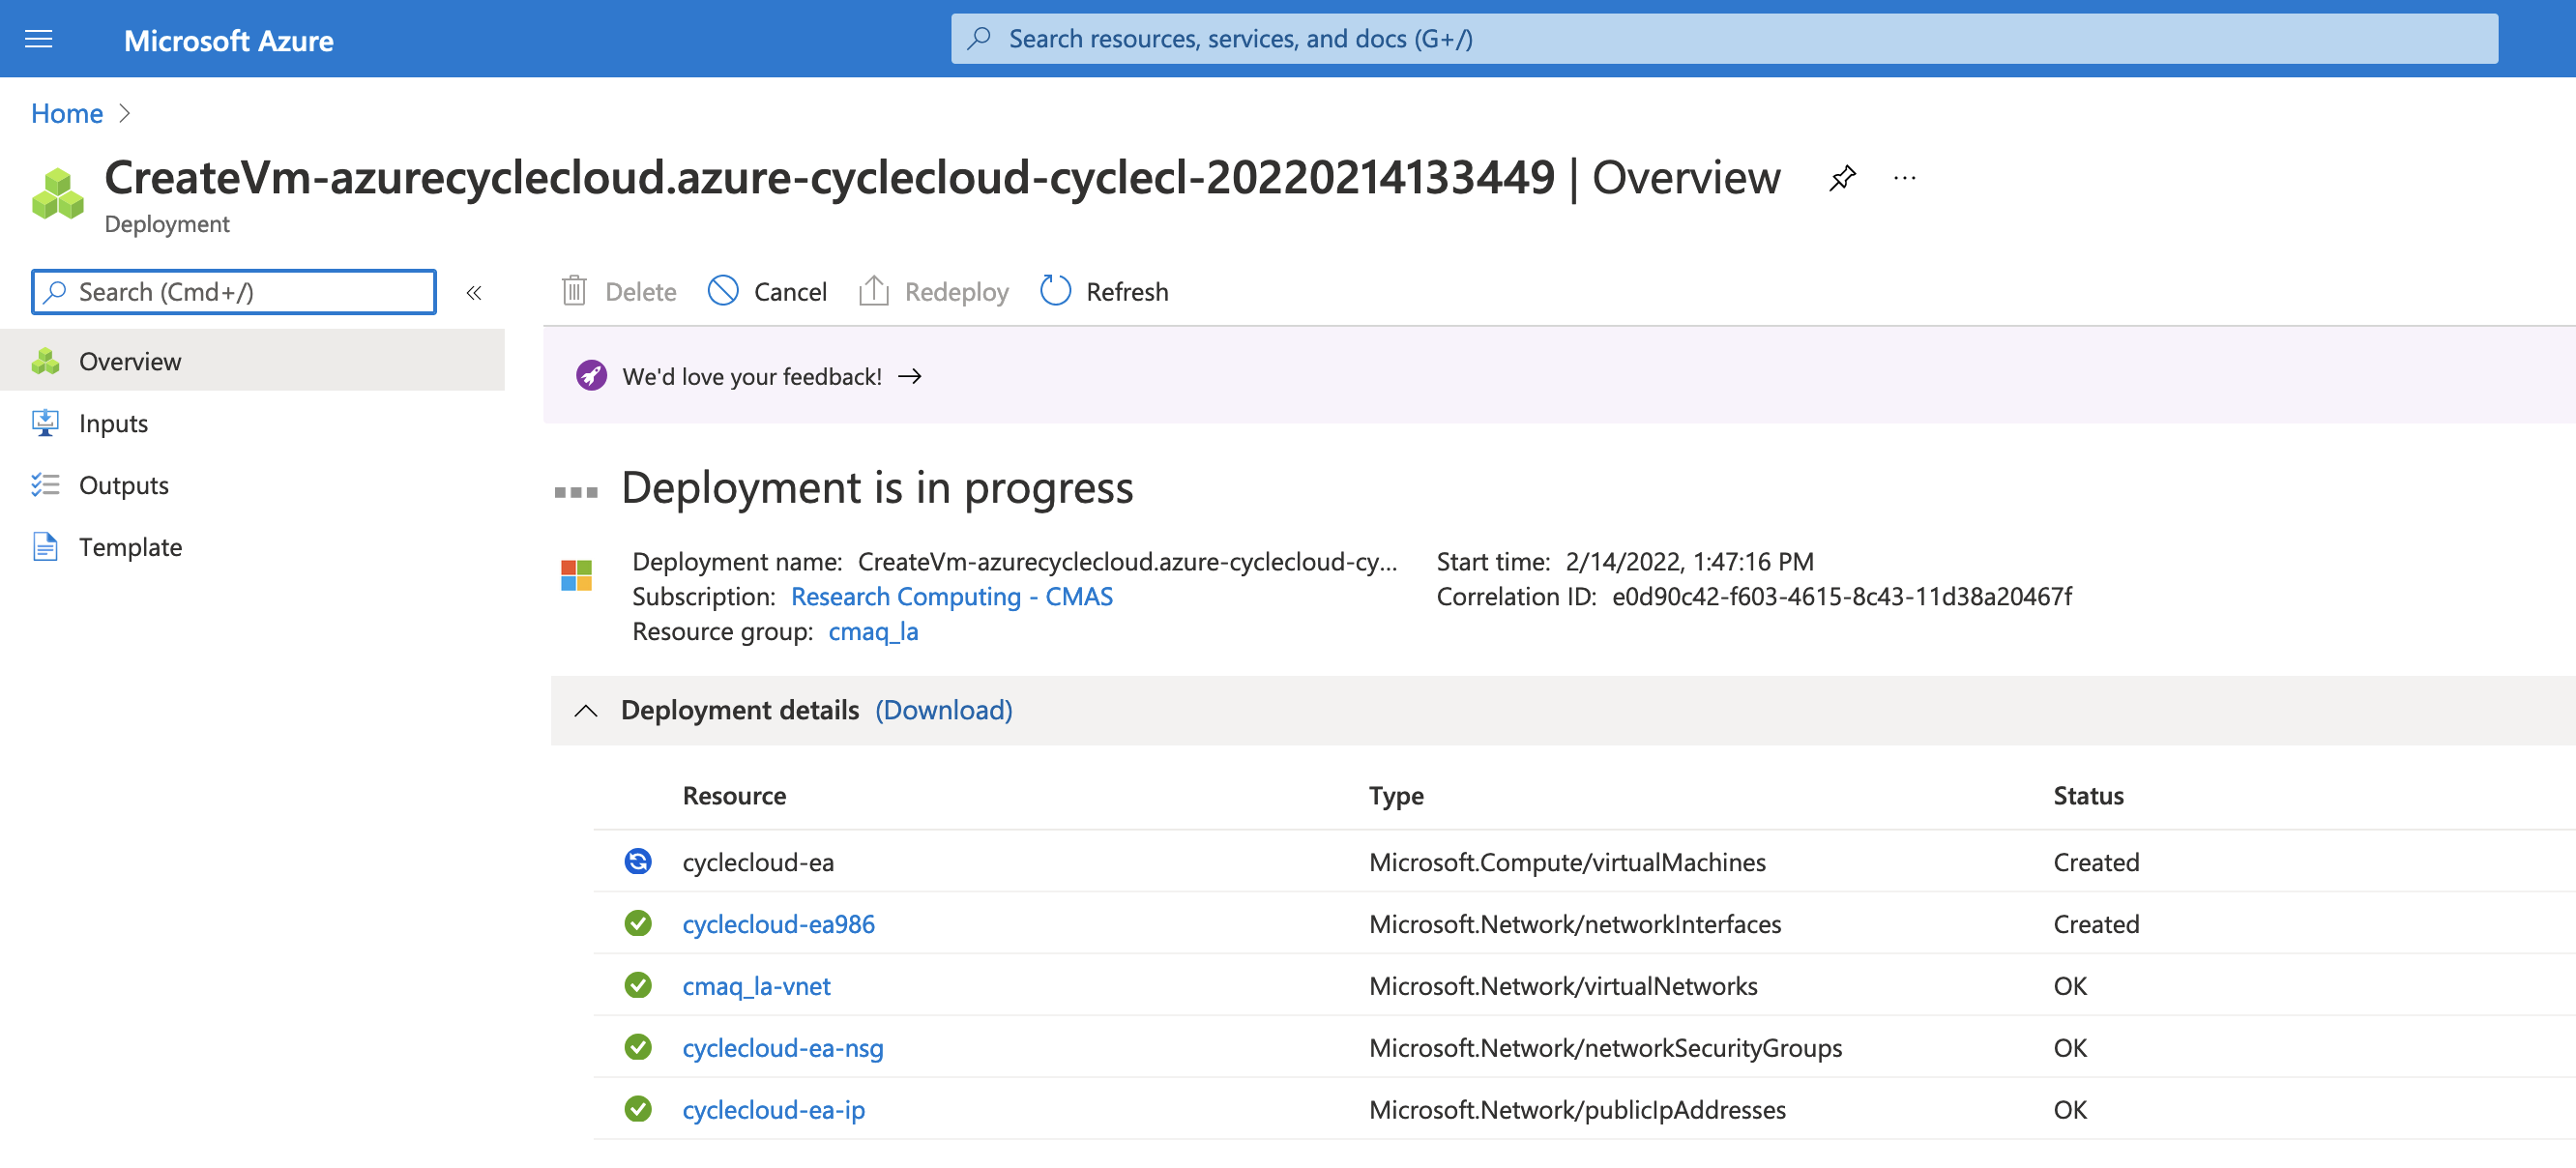
Figure 6. Your Deployment is complete - click on blue button Go to resource
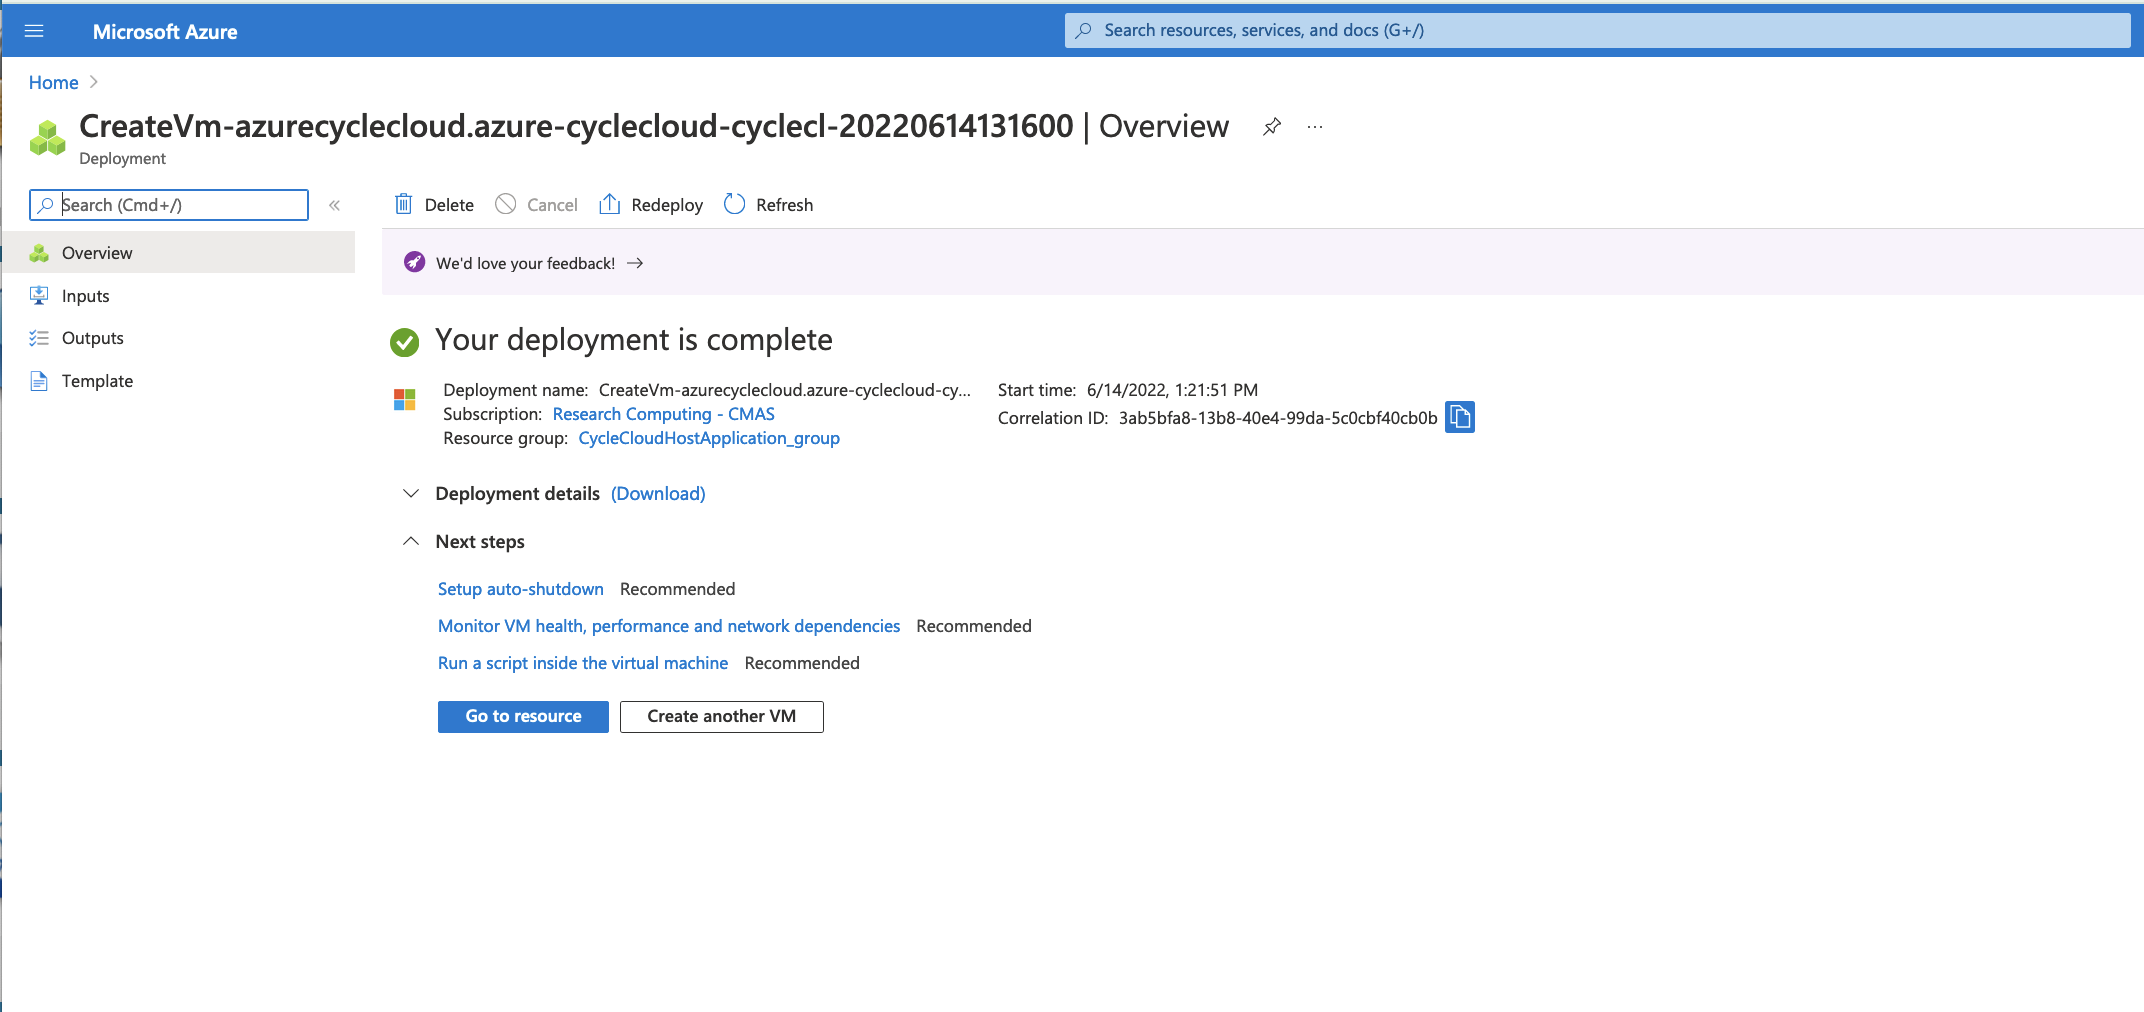
After the CycleCloud Host Machine has been deployed click on Go to resource
Add Contributor Role to Virtual Machine -
Figure 7. Click on Identity Icon on left side of CycleCloudHost Application Virtual Machine
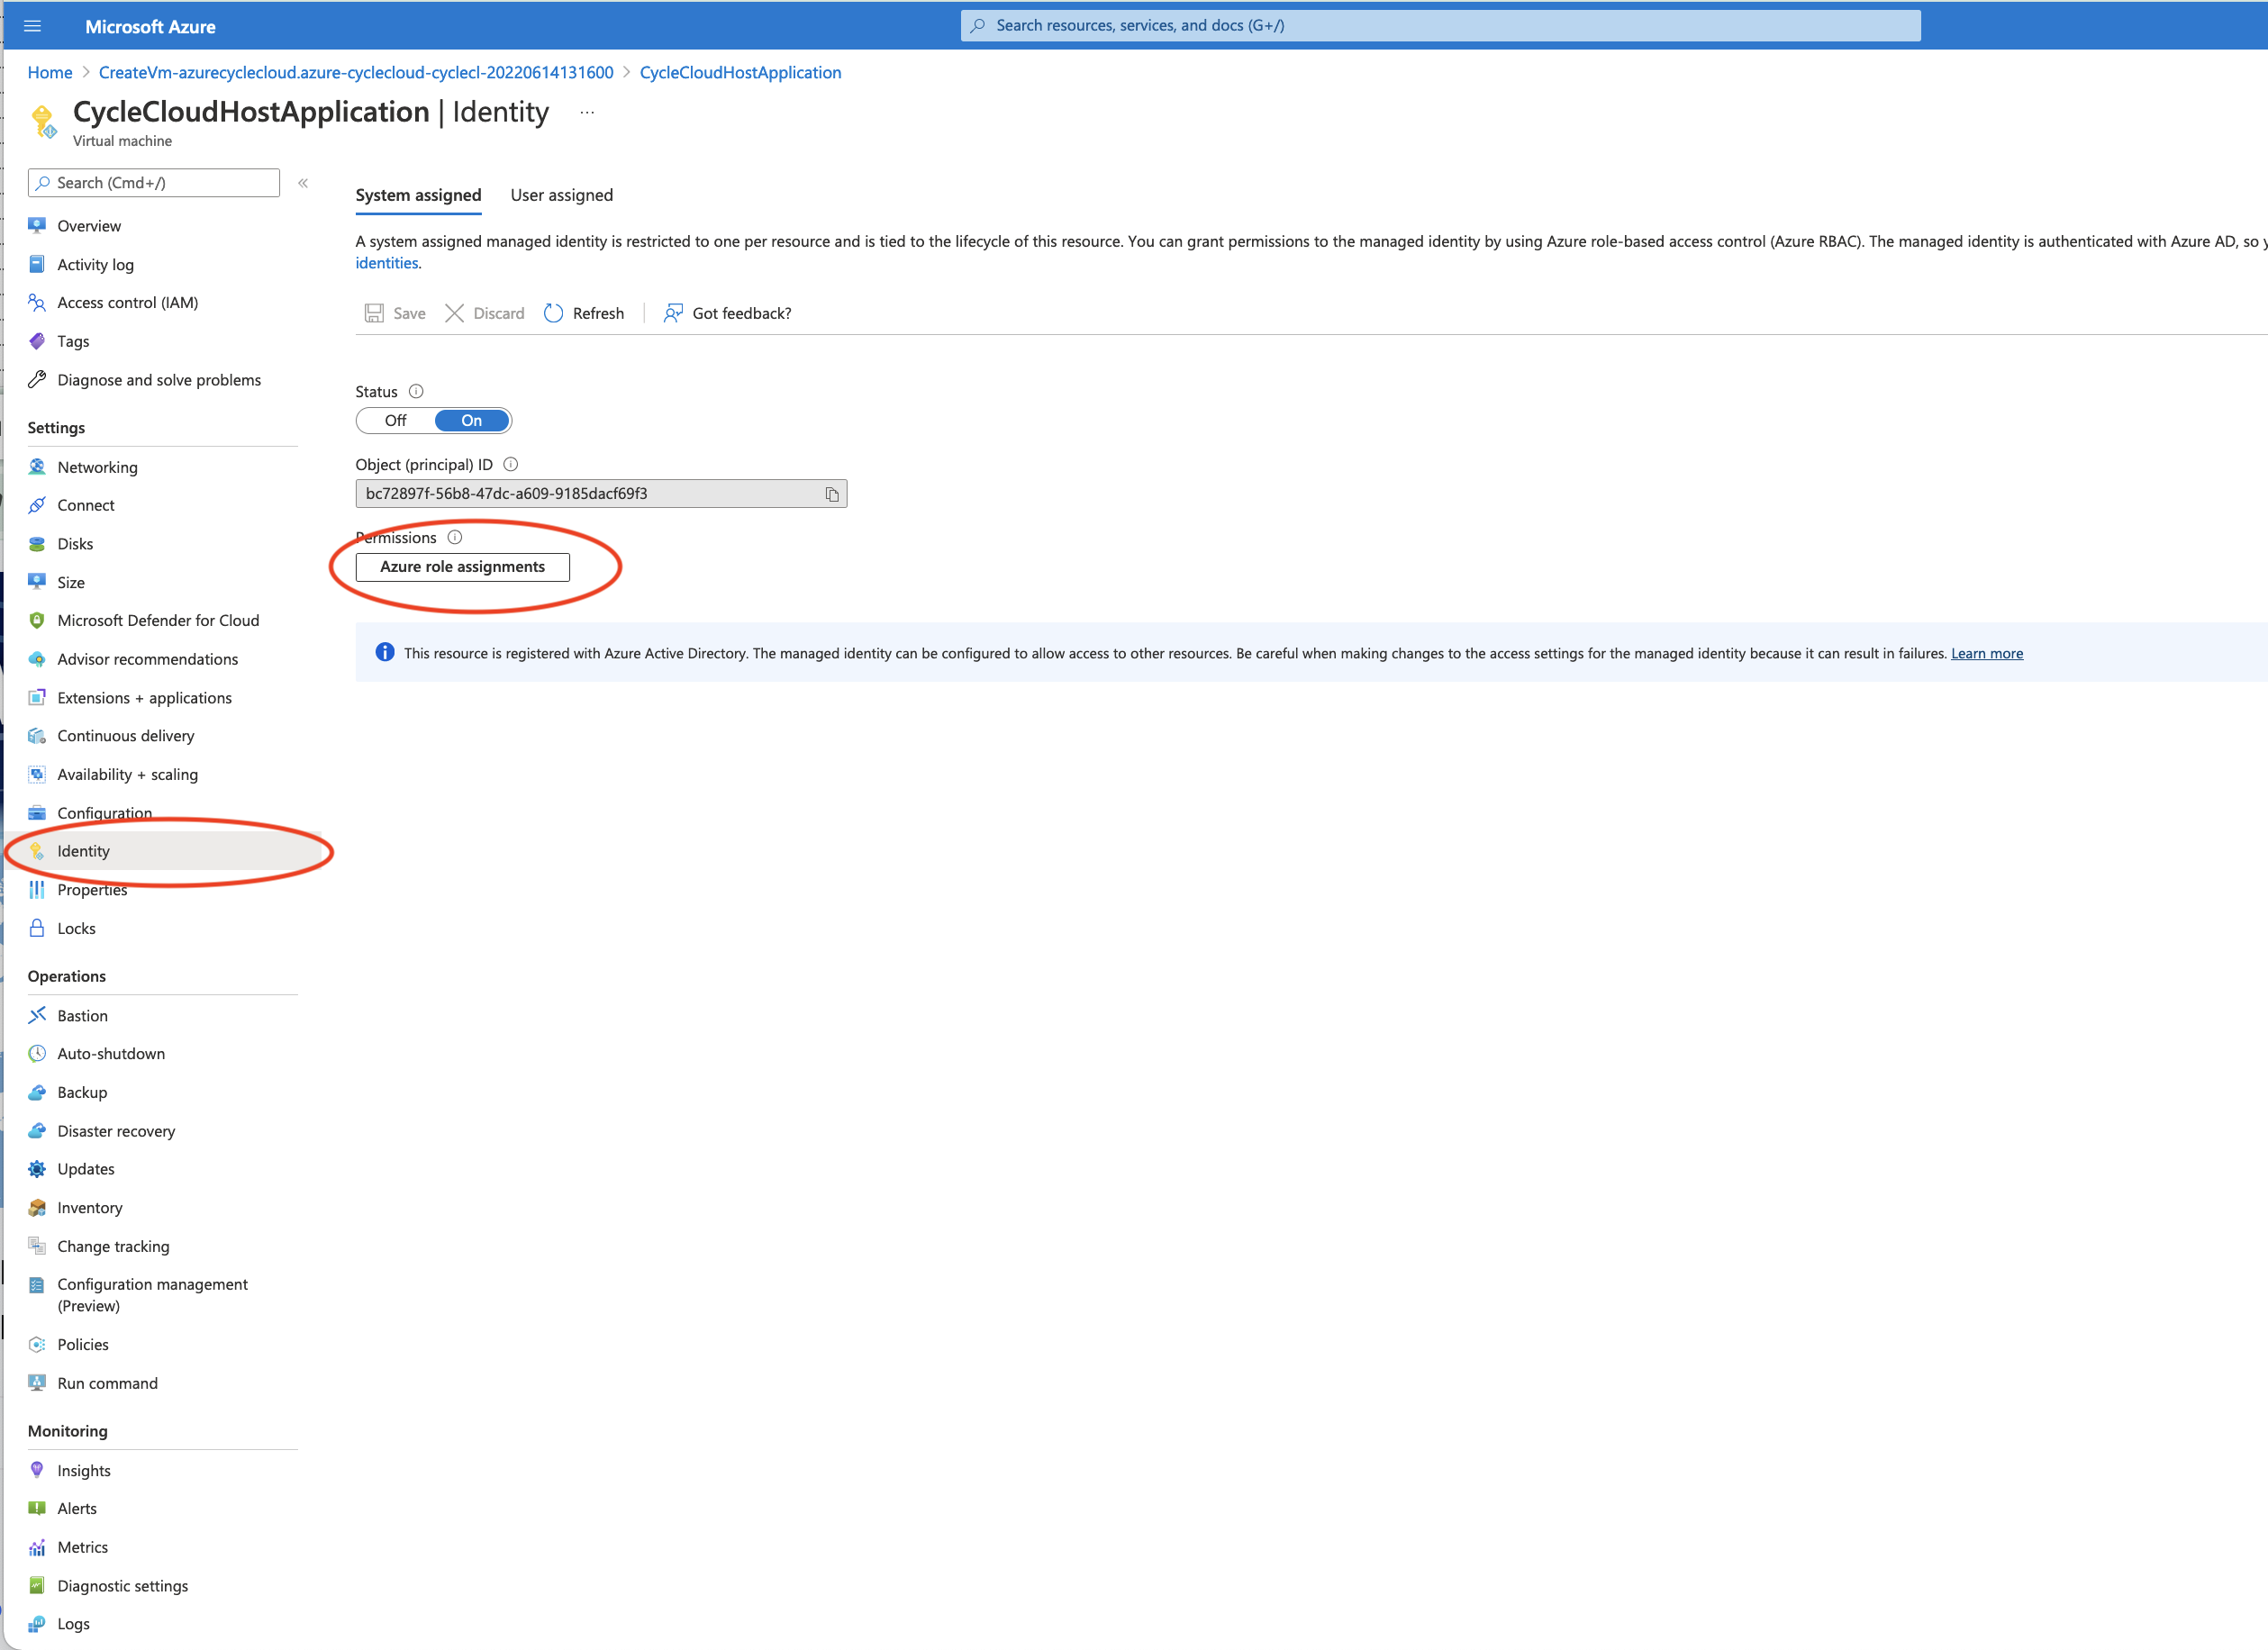
Click on the Identity Menu on the left side of the newly created virtual machine.
Make sure you select the System Assigned Tab at the top of the window.
Click on the button Azure Role Assignments
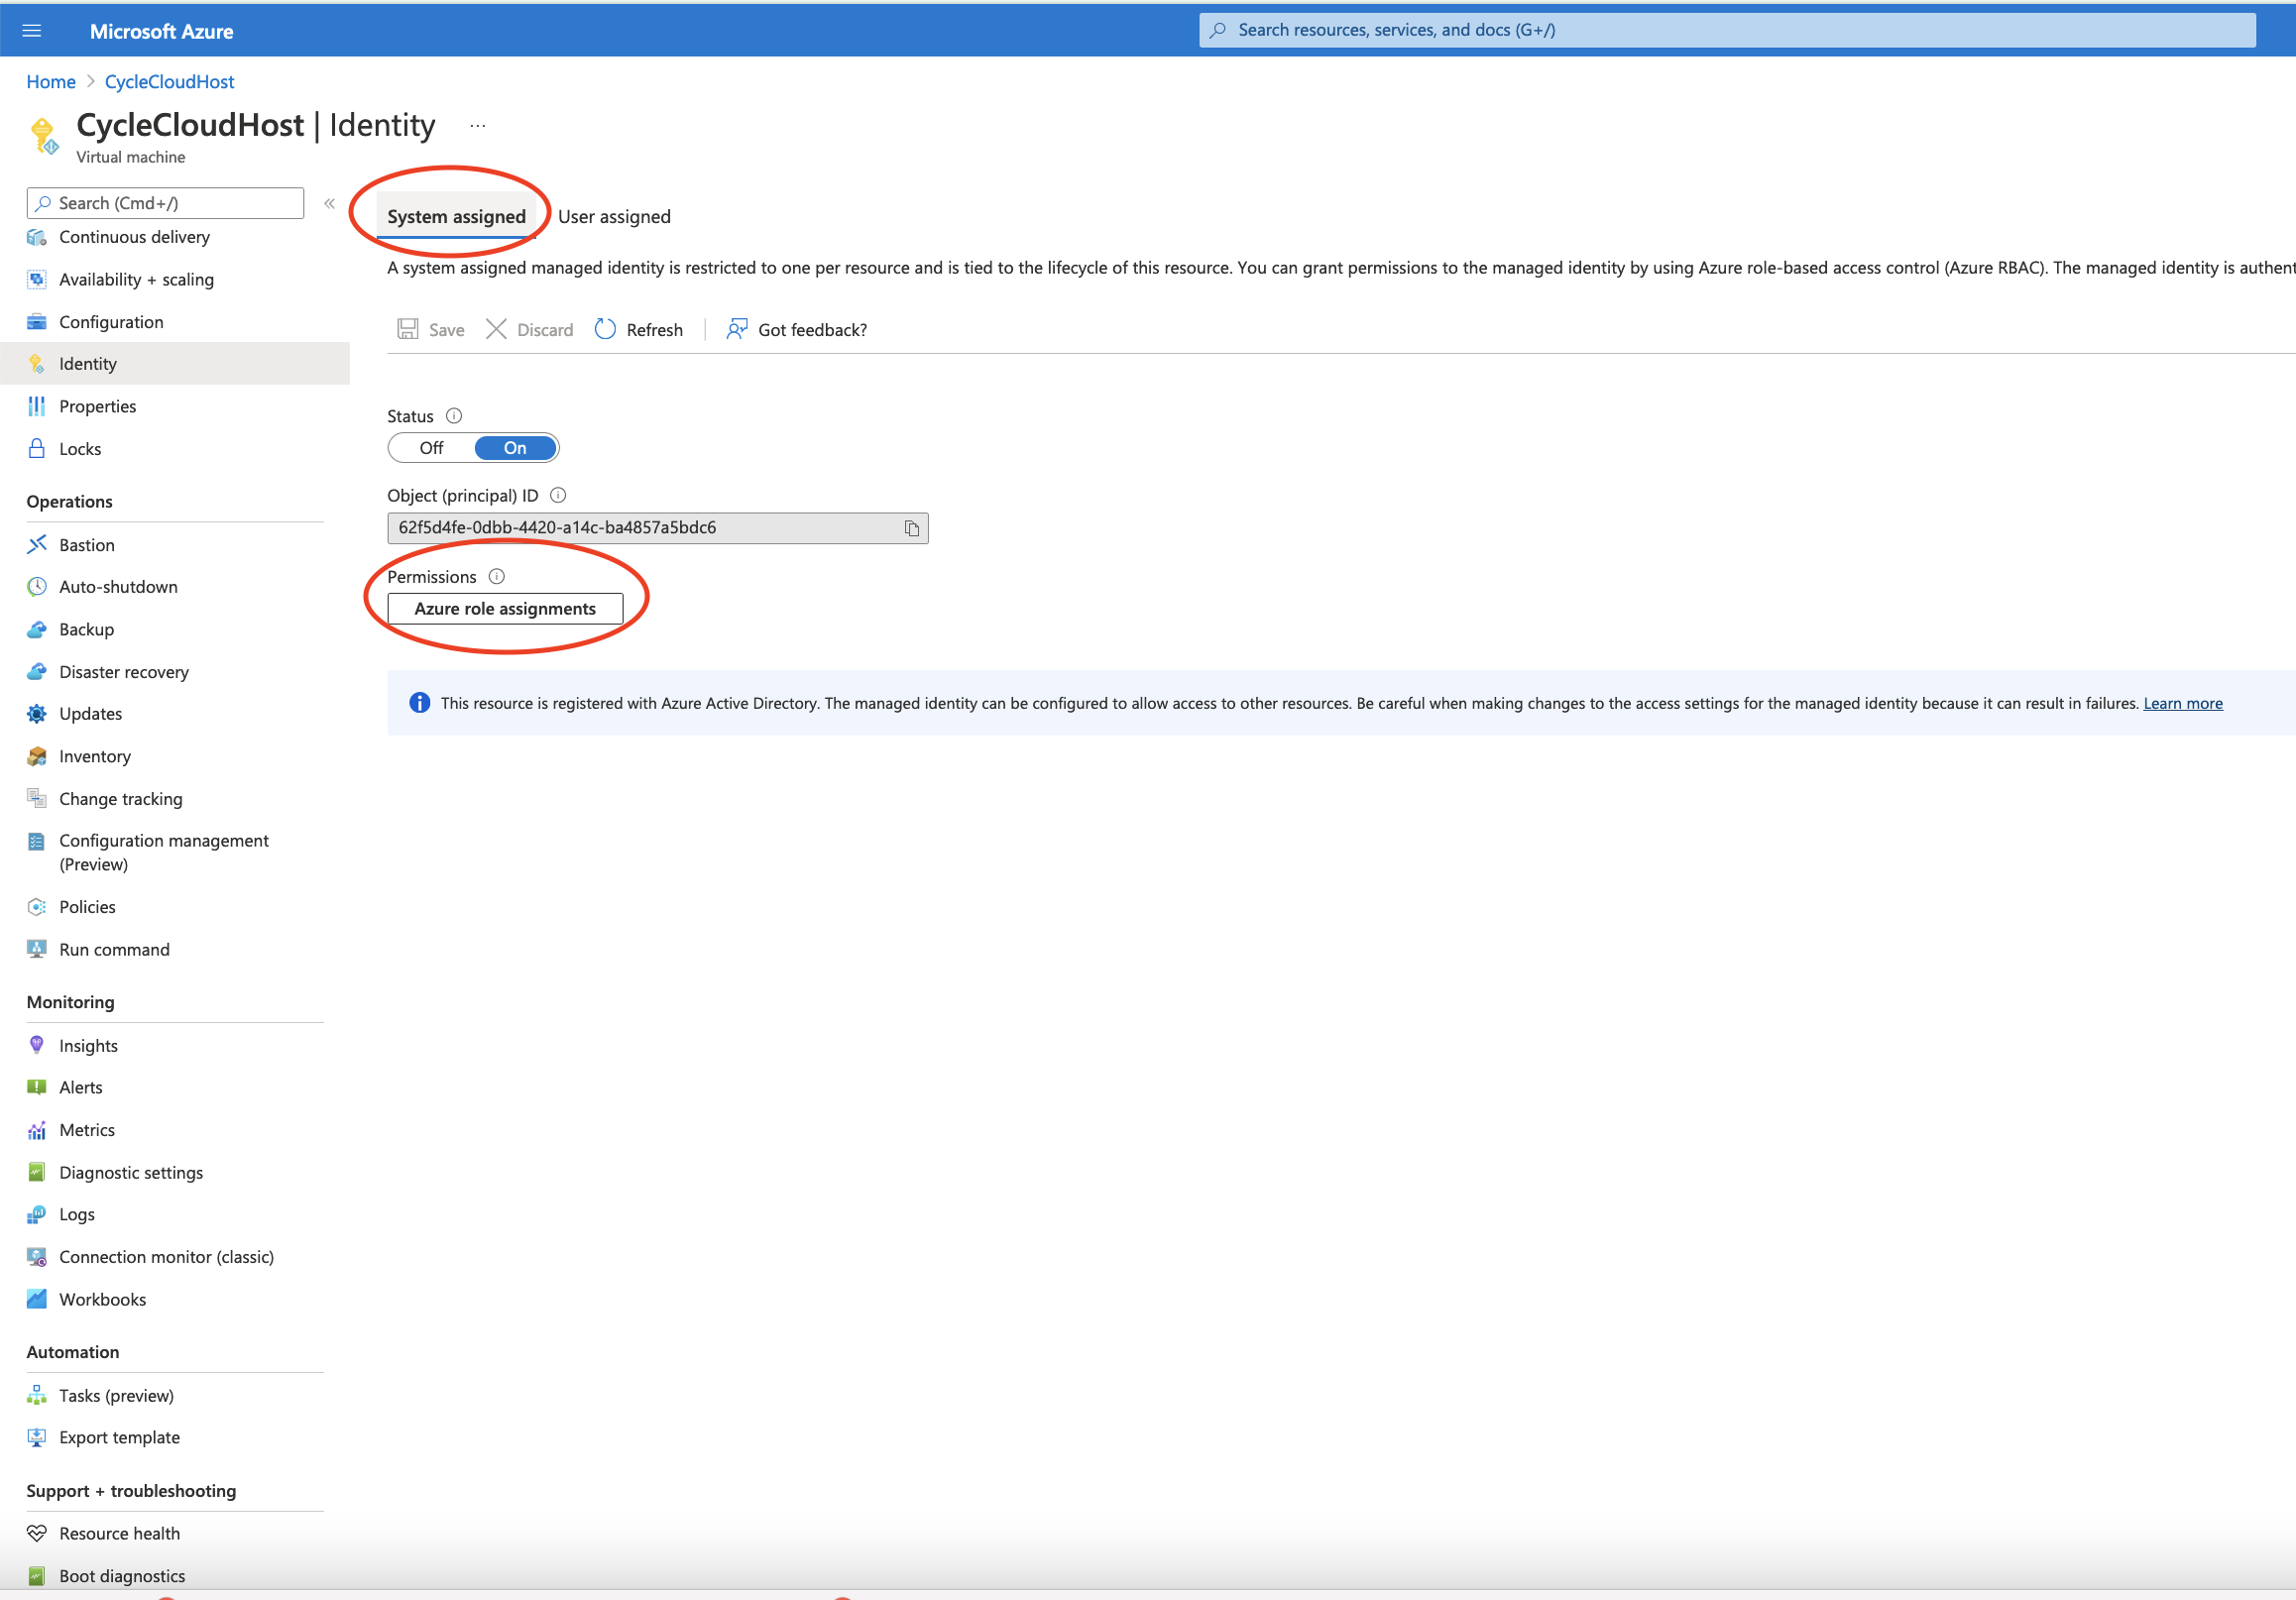
Figure 8. Make sure you select the System Assigned Tab at the top of the window.
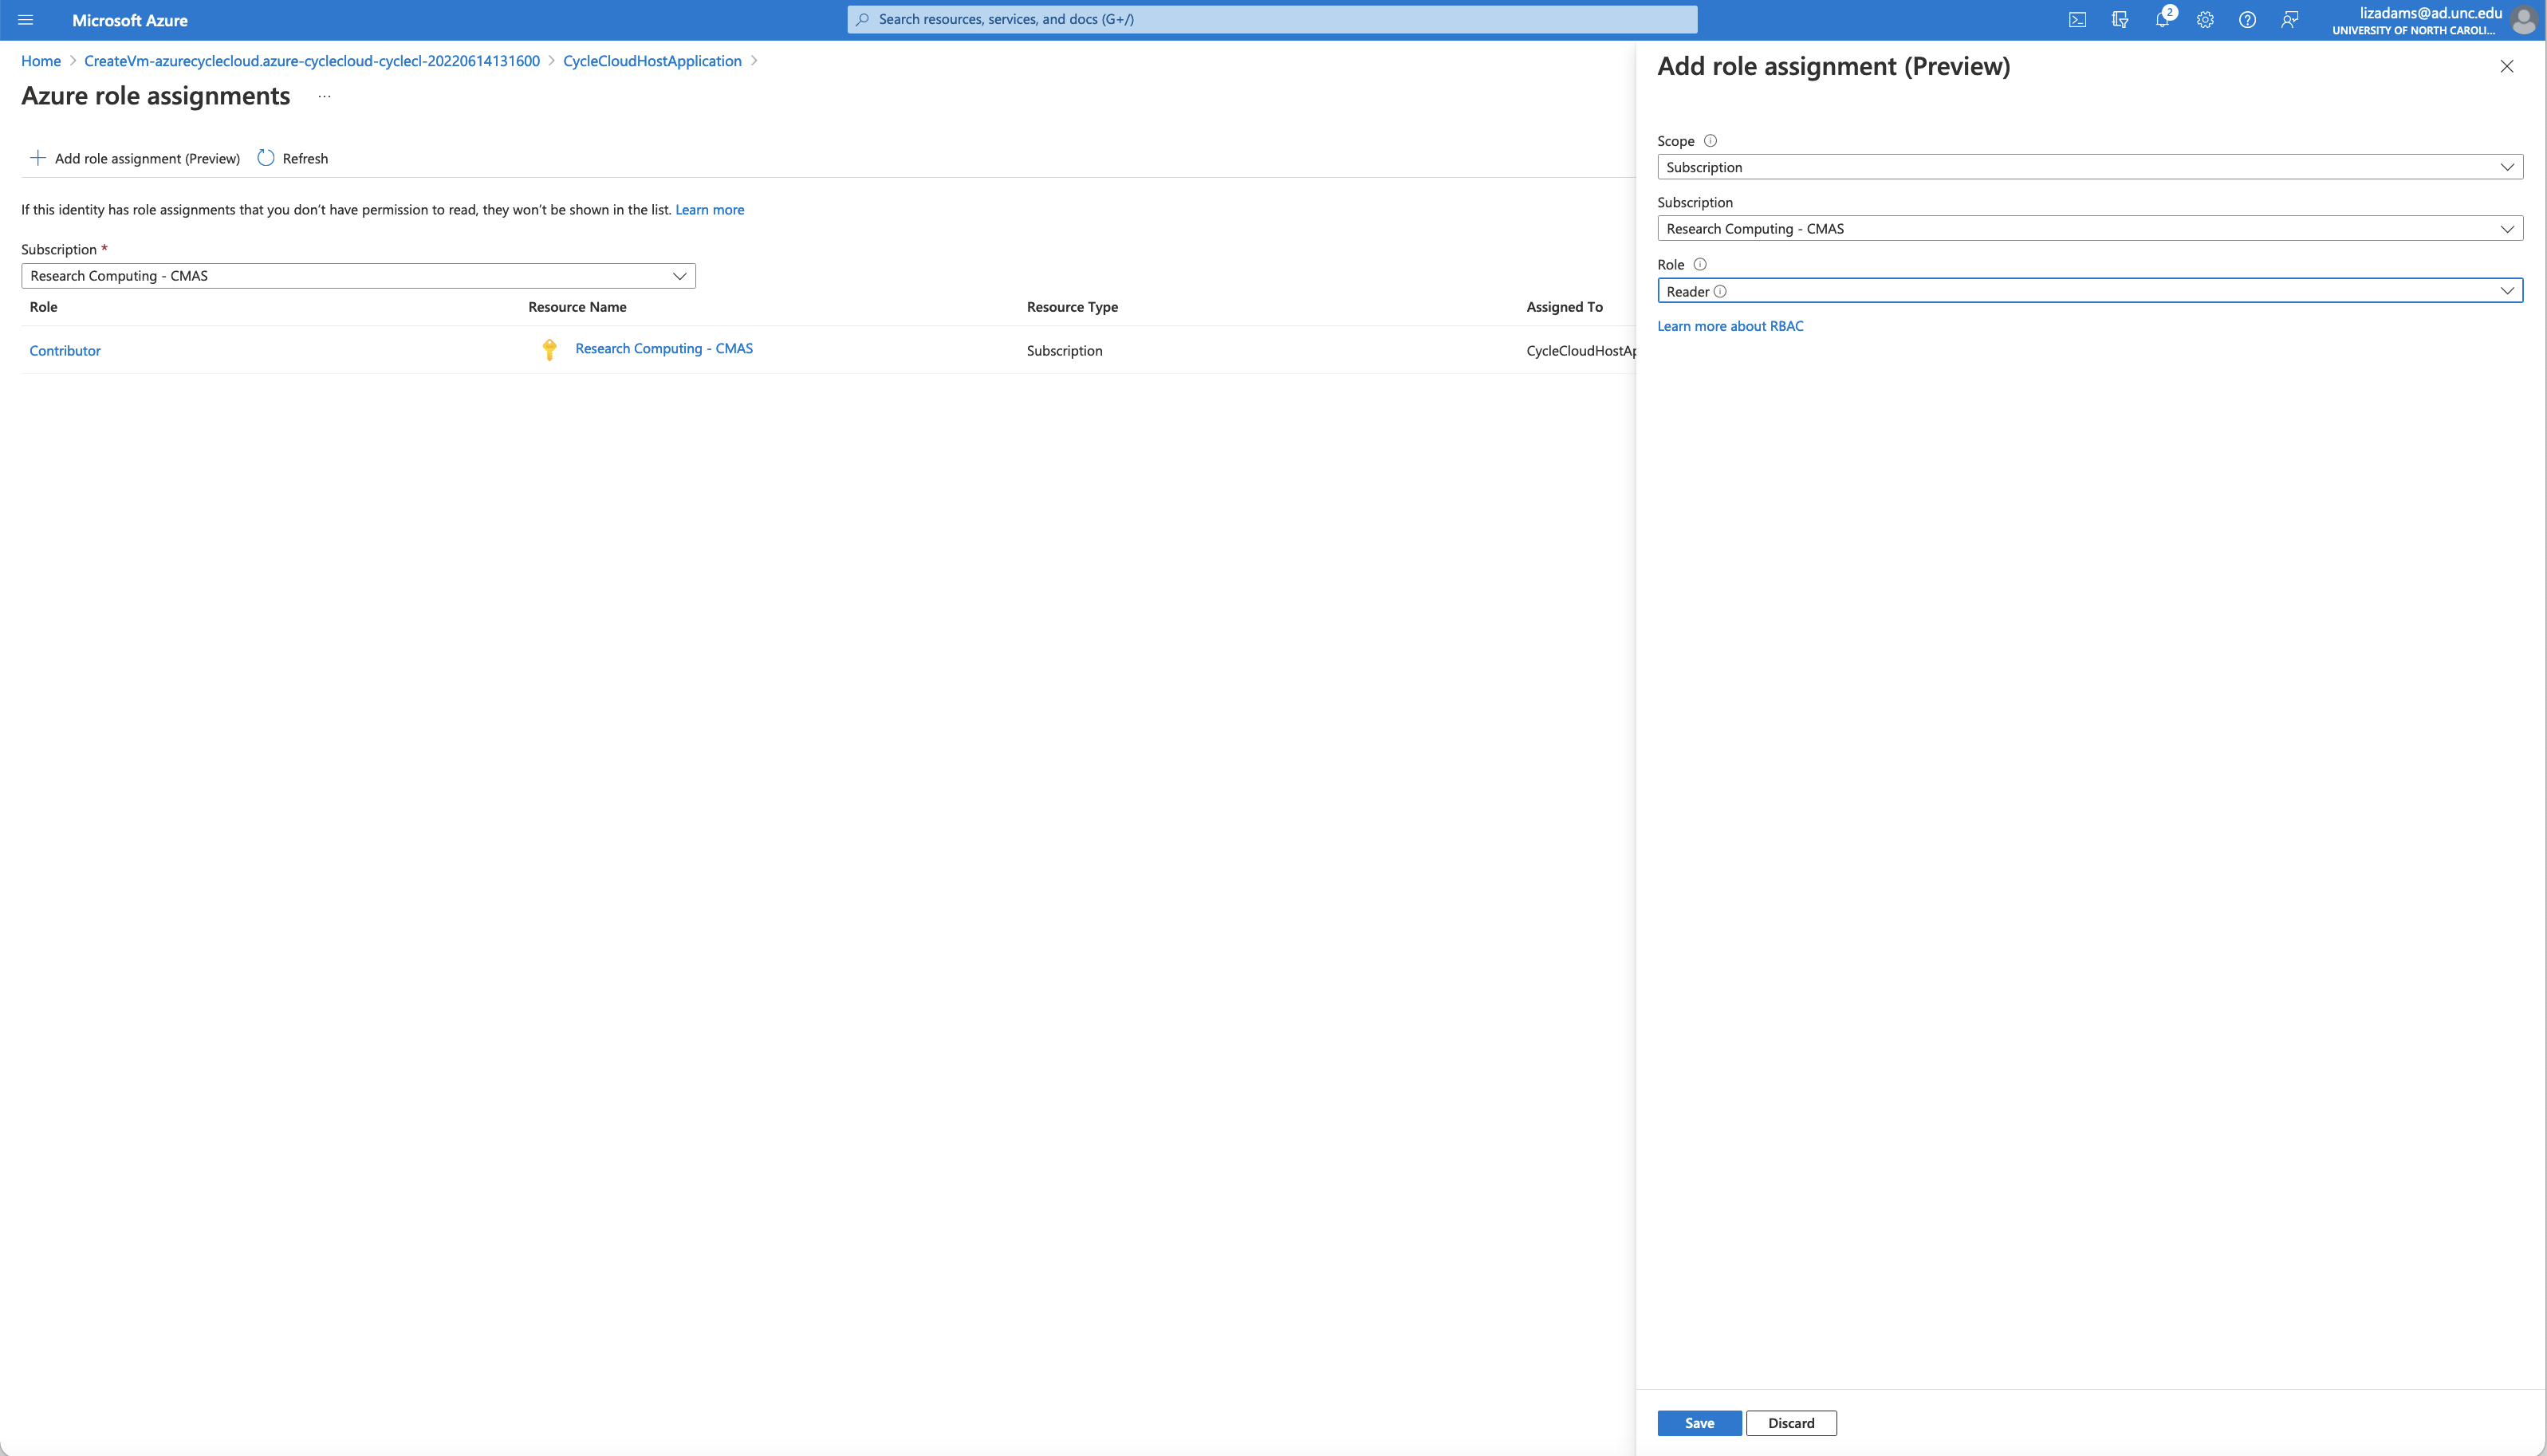
On the Azure role assignments window click on the + Add role assignment(Preview)
Figure 9. Add System Assigned Role Assignment - Management Identity
Click on Azure role assignements Search for Managed Identity Operator

Figure 10. Add Role Assignment
Click Identity Icon under Settings on the left side menu
Click Azure role assignments
Click Add role assignment
Search for Contributor
Figure 11. Add Reader Role to Virtual Machine
Create Storage Account#
Question: Do I need to create a new storage account for each CycleCloud Virtual Machine Host?
In the search bar, enter Storage Account, the select + Create Storage Account
Select the resource group associated with the CycleCloudHost that you created CycleCloudHost_group Select a lowercase name Then switch from the Basics tab to the Advanced Tab Uncheck the box next to Enable blob public access. Click Review and Create After the verification passed message is received Click Create
Figure 12. Azure Create Storage Account Details
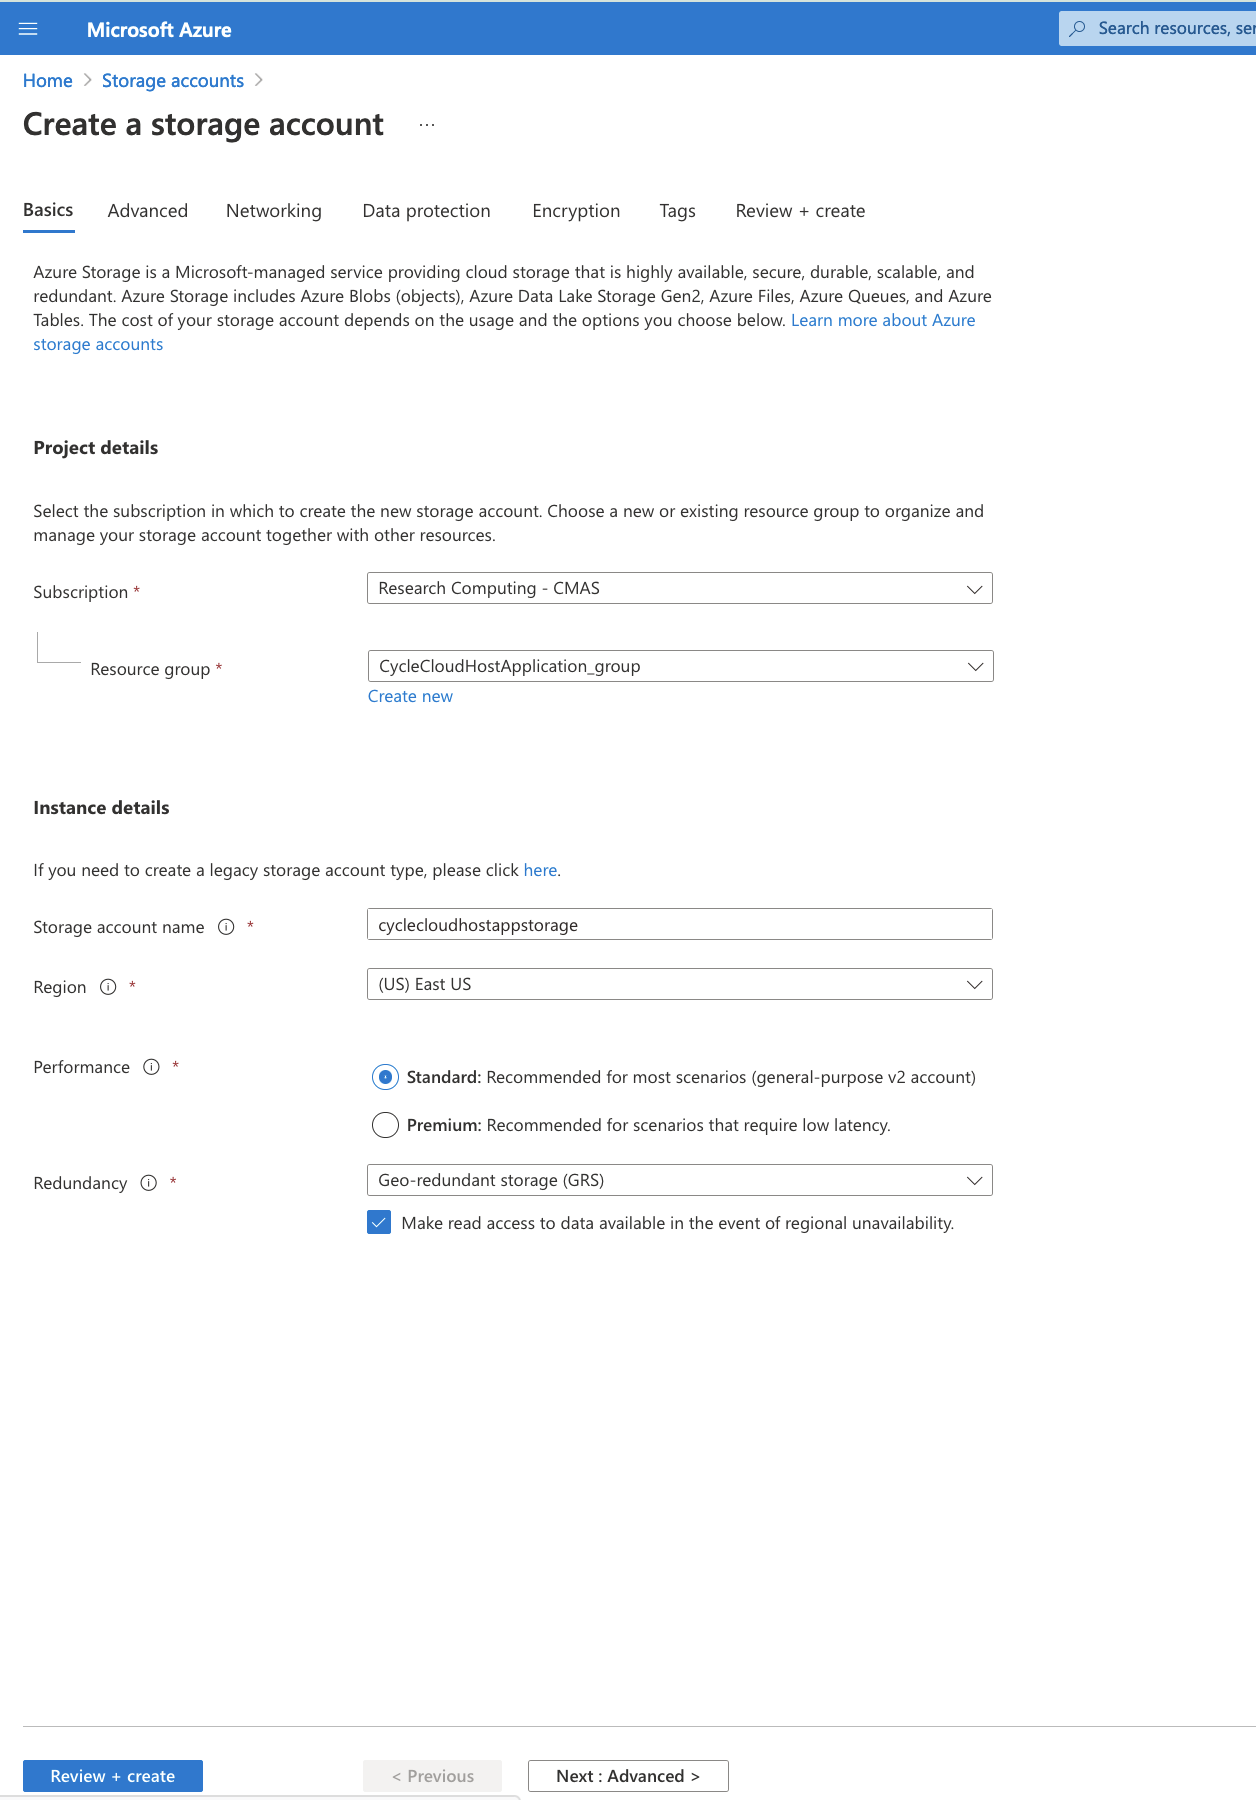
For Redundancy choose Local Redundant Storage instead of Geo-Redundant Storage to reduce costs.
Figure 13. Azure Storage Account disable Public Blob Access
Disable the Public Blob Access by unclicking the box next to Enable blob public access
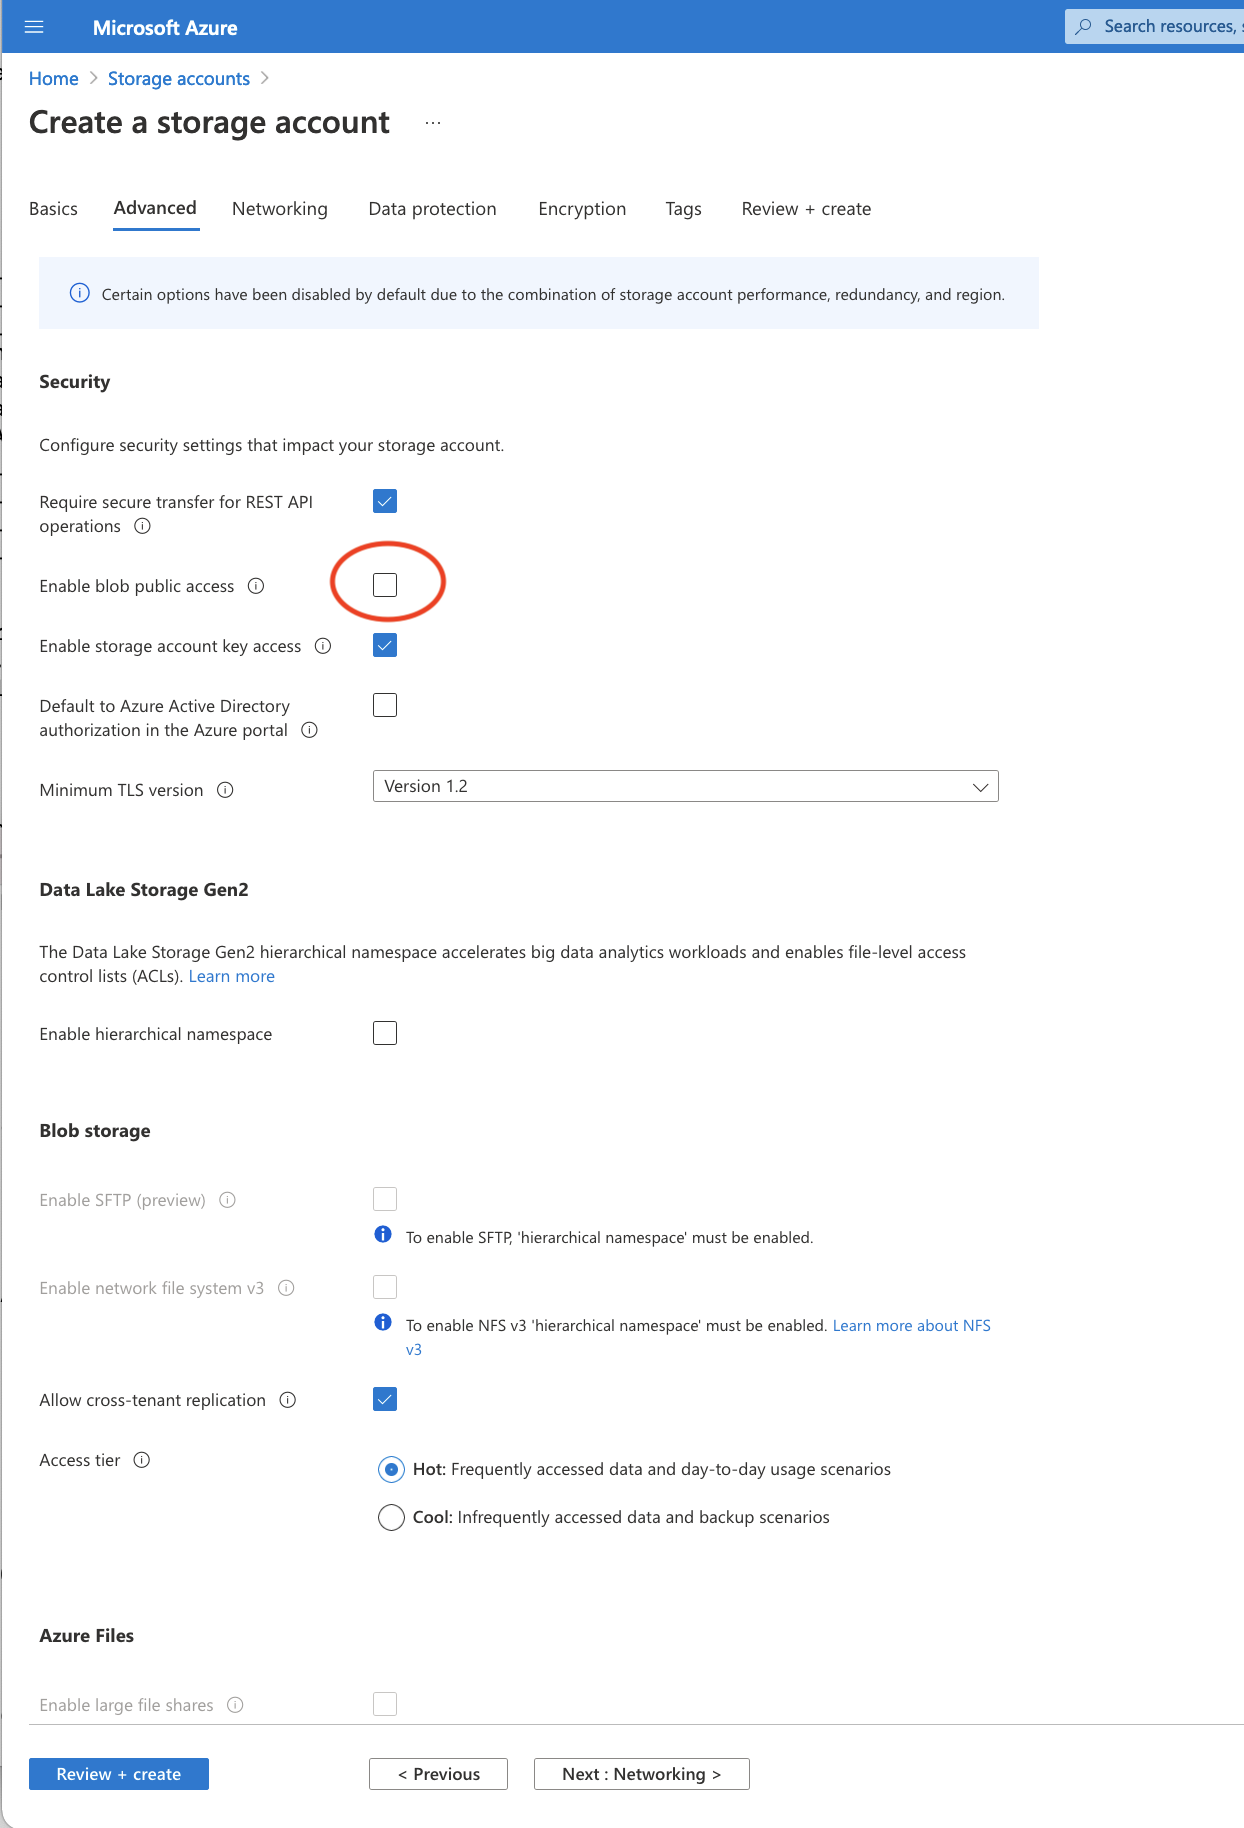
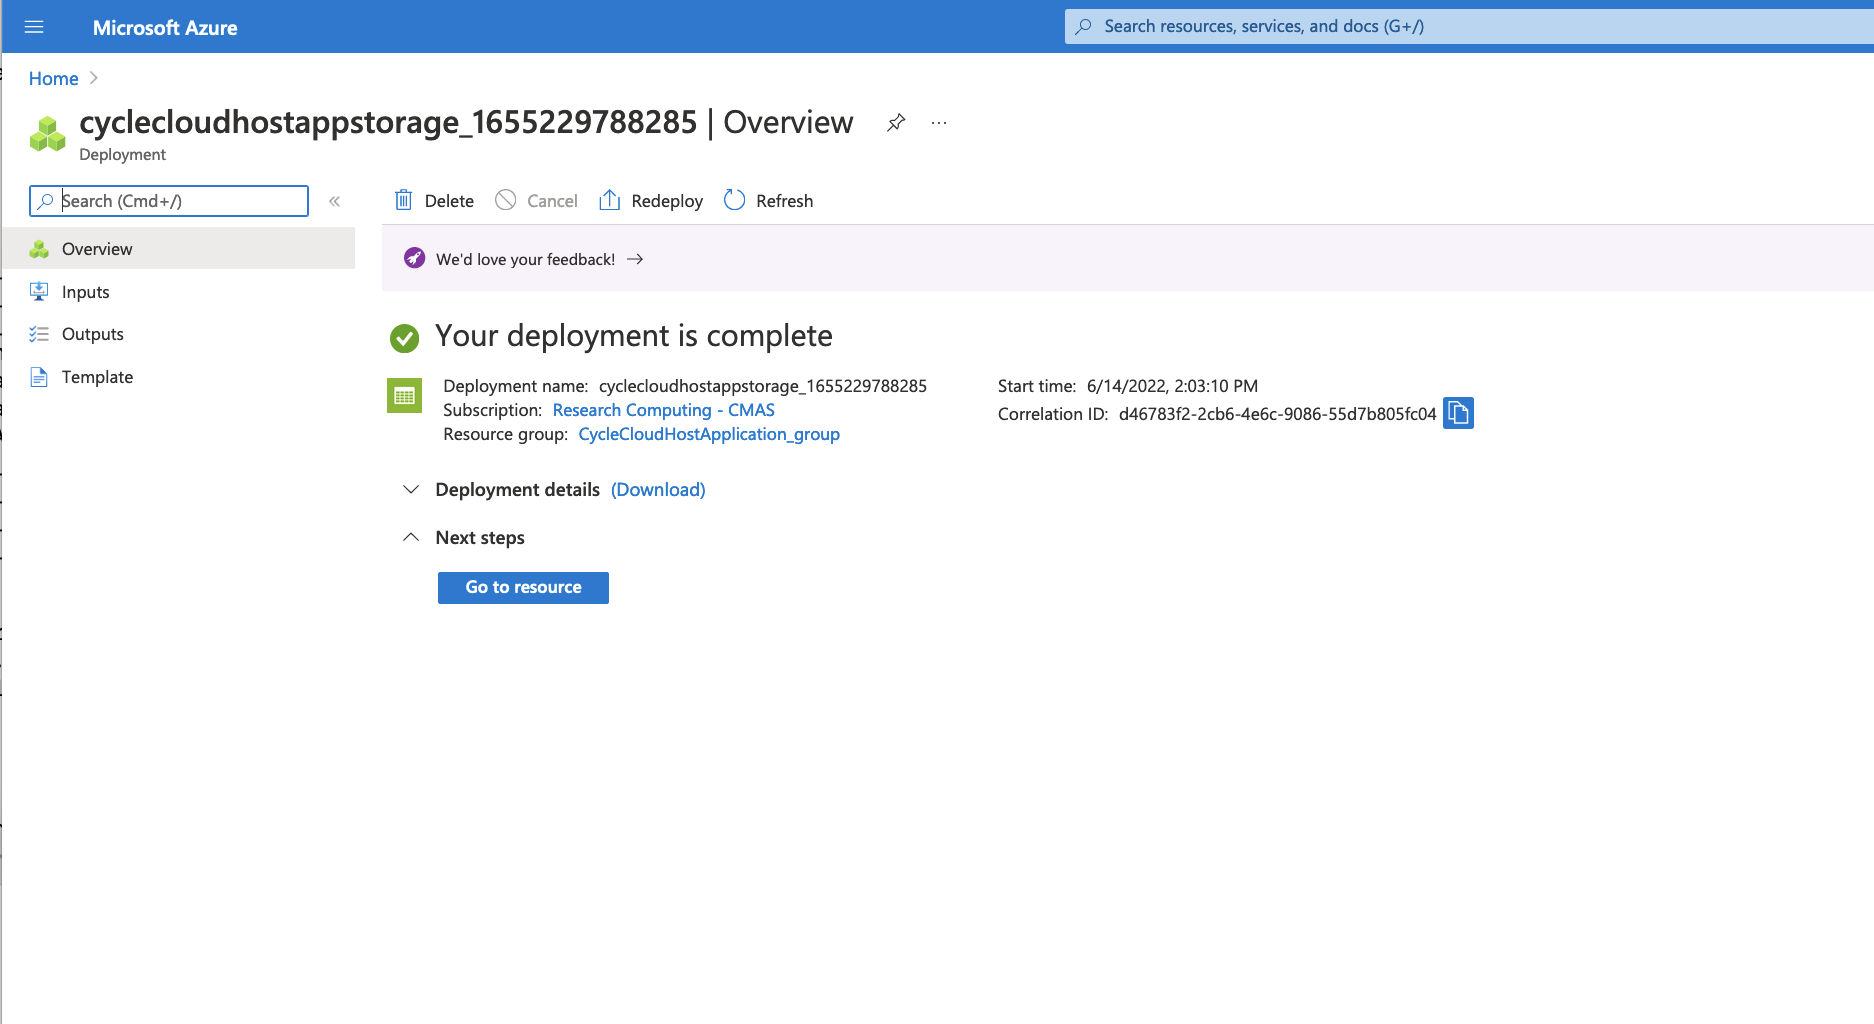
Figure 14. Storage Account Deployment is complete
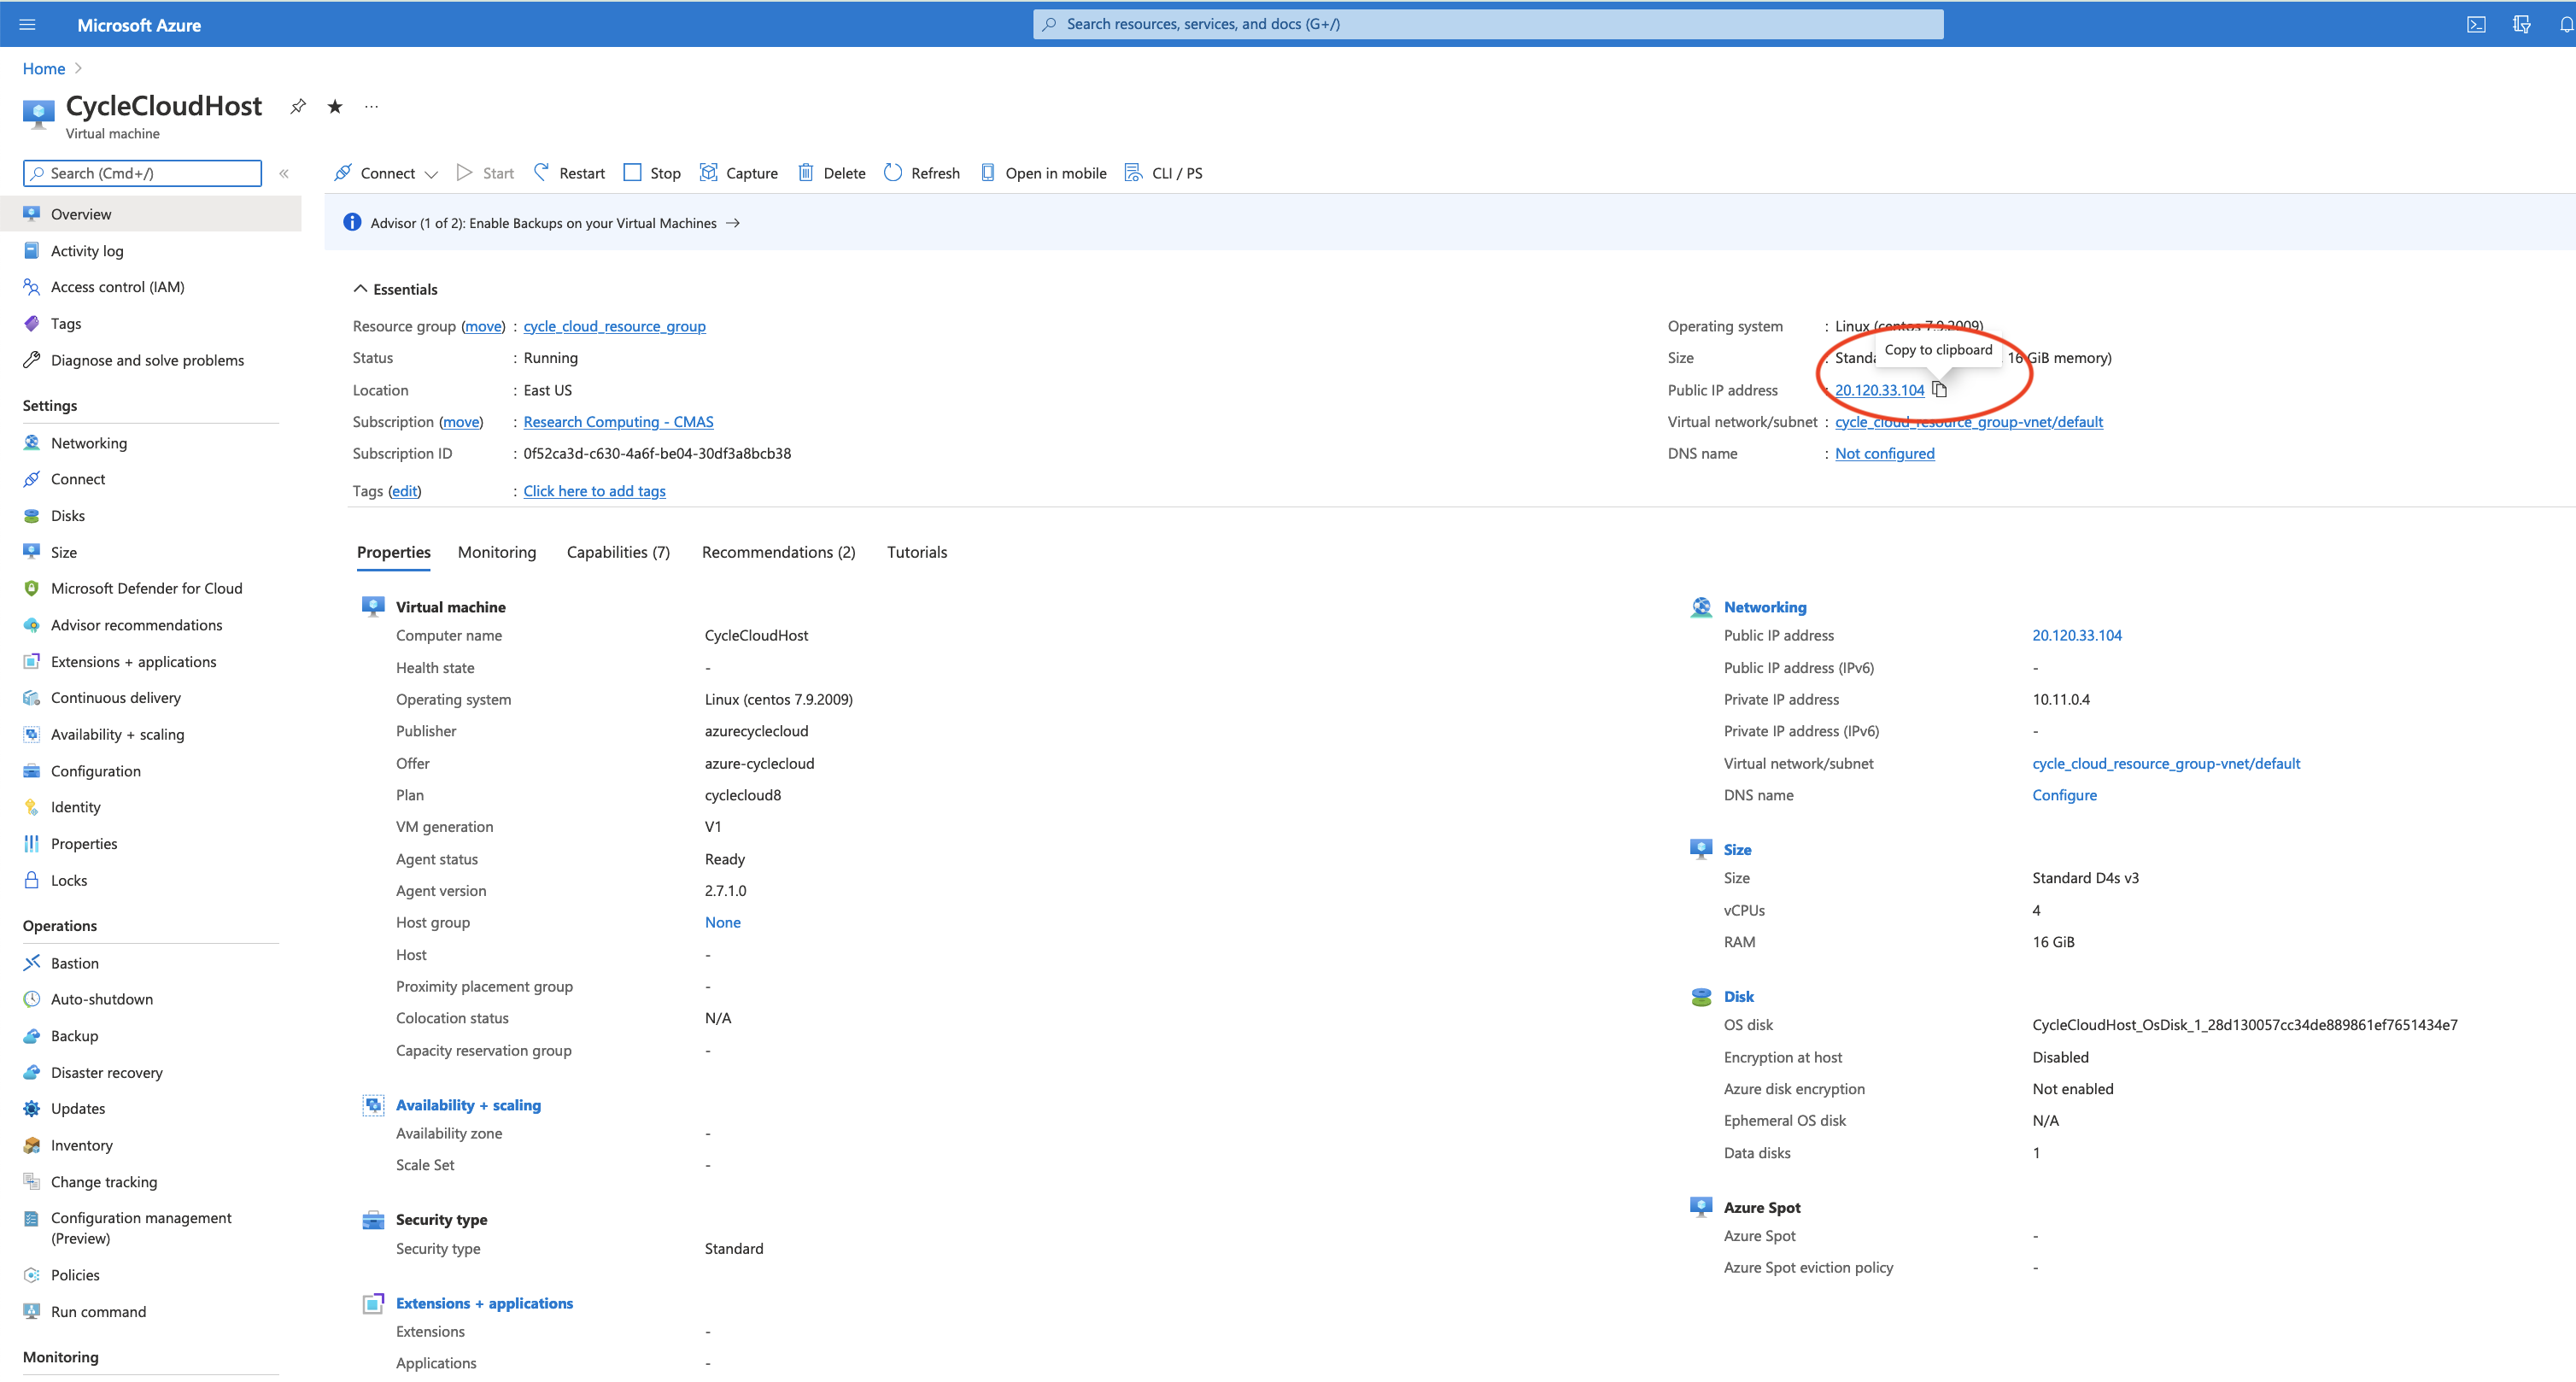
Click on Home to return to the Azure Portal and then Click on the CycleCloudHostApplication Virtual Machine
Click on Copy next to the Public IP address to copy it.
Figure 15. Azure Cycle Cloud Host Machine IP address
4.1.3. Connect to Cyclecloud Web Interface#
In your web browser, create a new tab, and enter the IP address that you copied from the step above.
https://-IP-ADDRESS/welcome
If you get a warning, potential security risk ahead, click on Advanced, then accept risk and continue.
Enter a Site Name - a unique name for the CycleCloud. example CycleCloudHostApplicationManager
Read and click that you agree to the CycleCloud Software License Agreement
Create your CycleCloud Administrator Account. This requires a public rsa key. Instructions for creating this are available here
Figure 16. Web Interface to CycleCloud - connect using the ip address for the Scheduler Node above http://-IP-ADDRESS/welcome
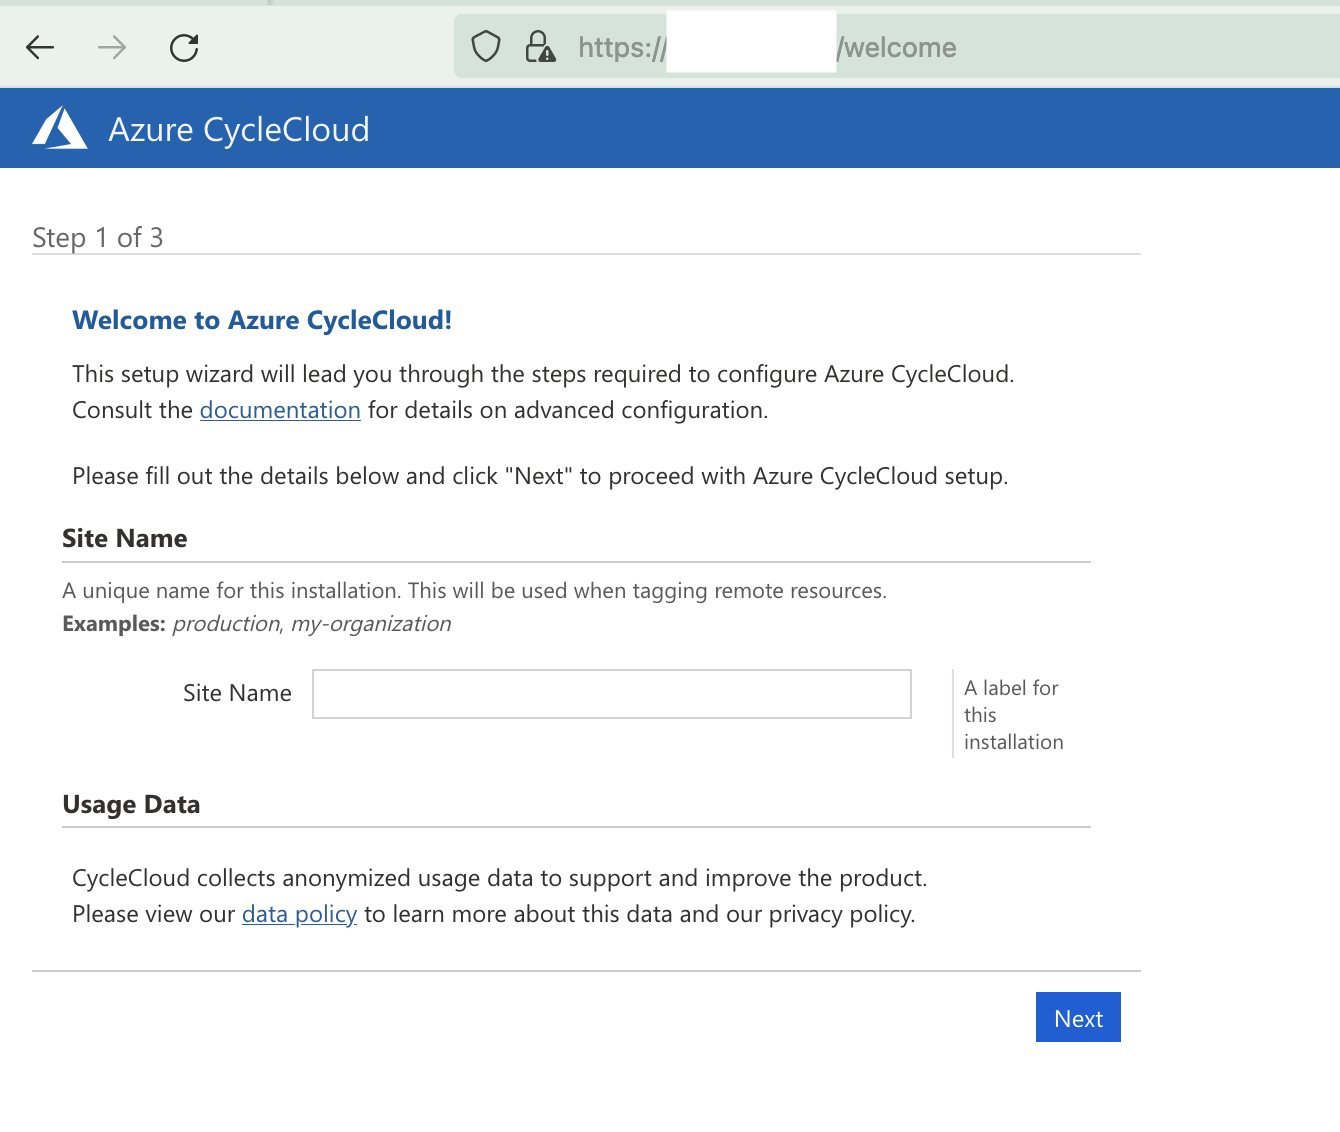
Figure 17. Azure CycleCloud Add Subscription ID
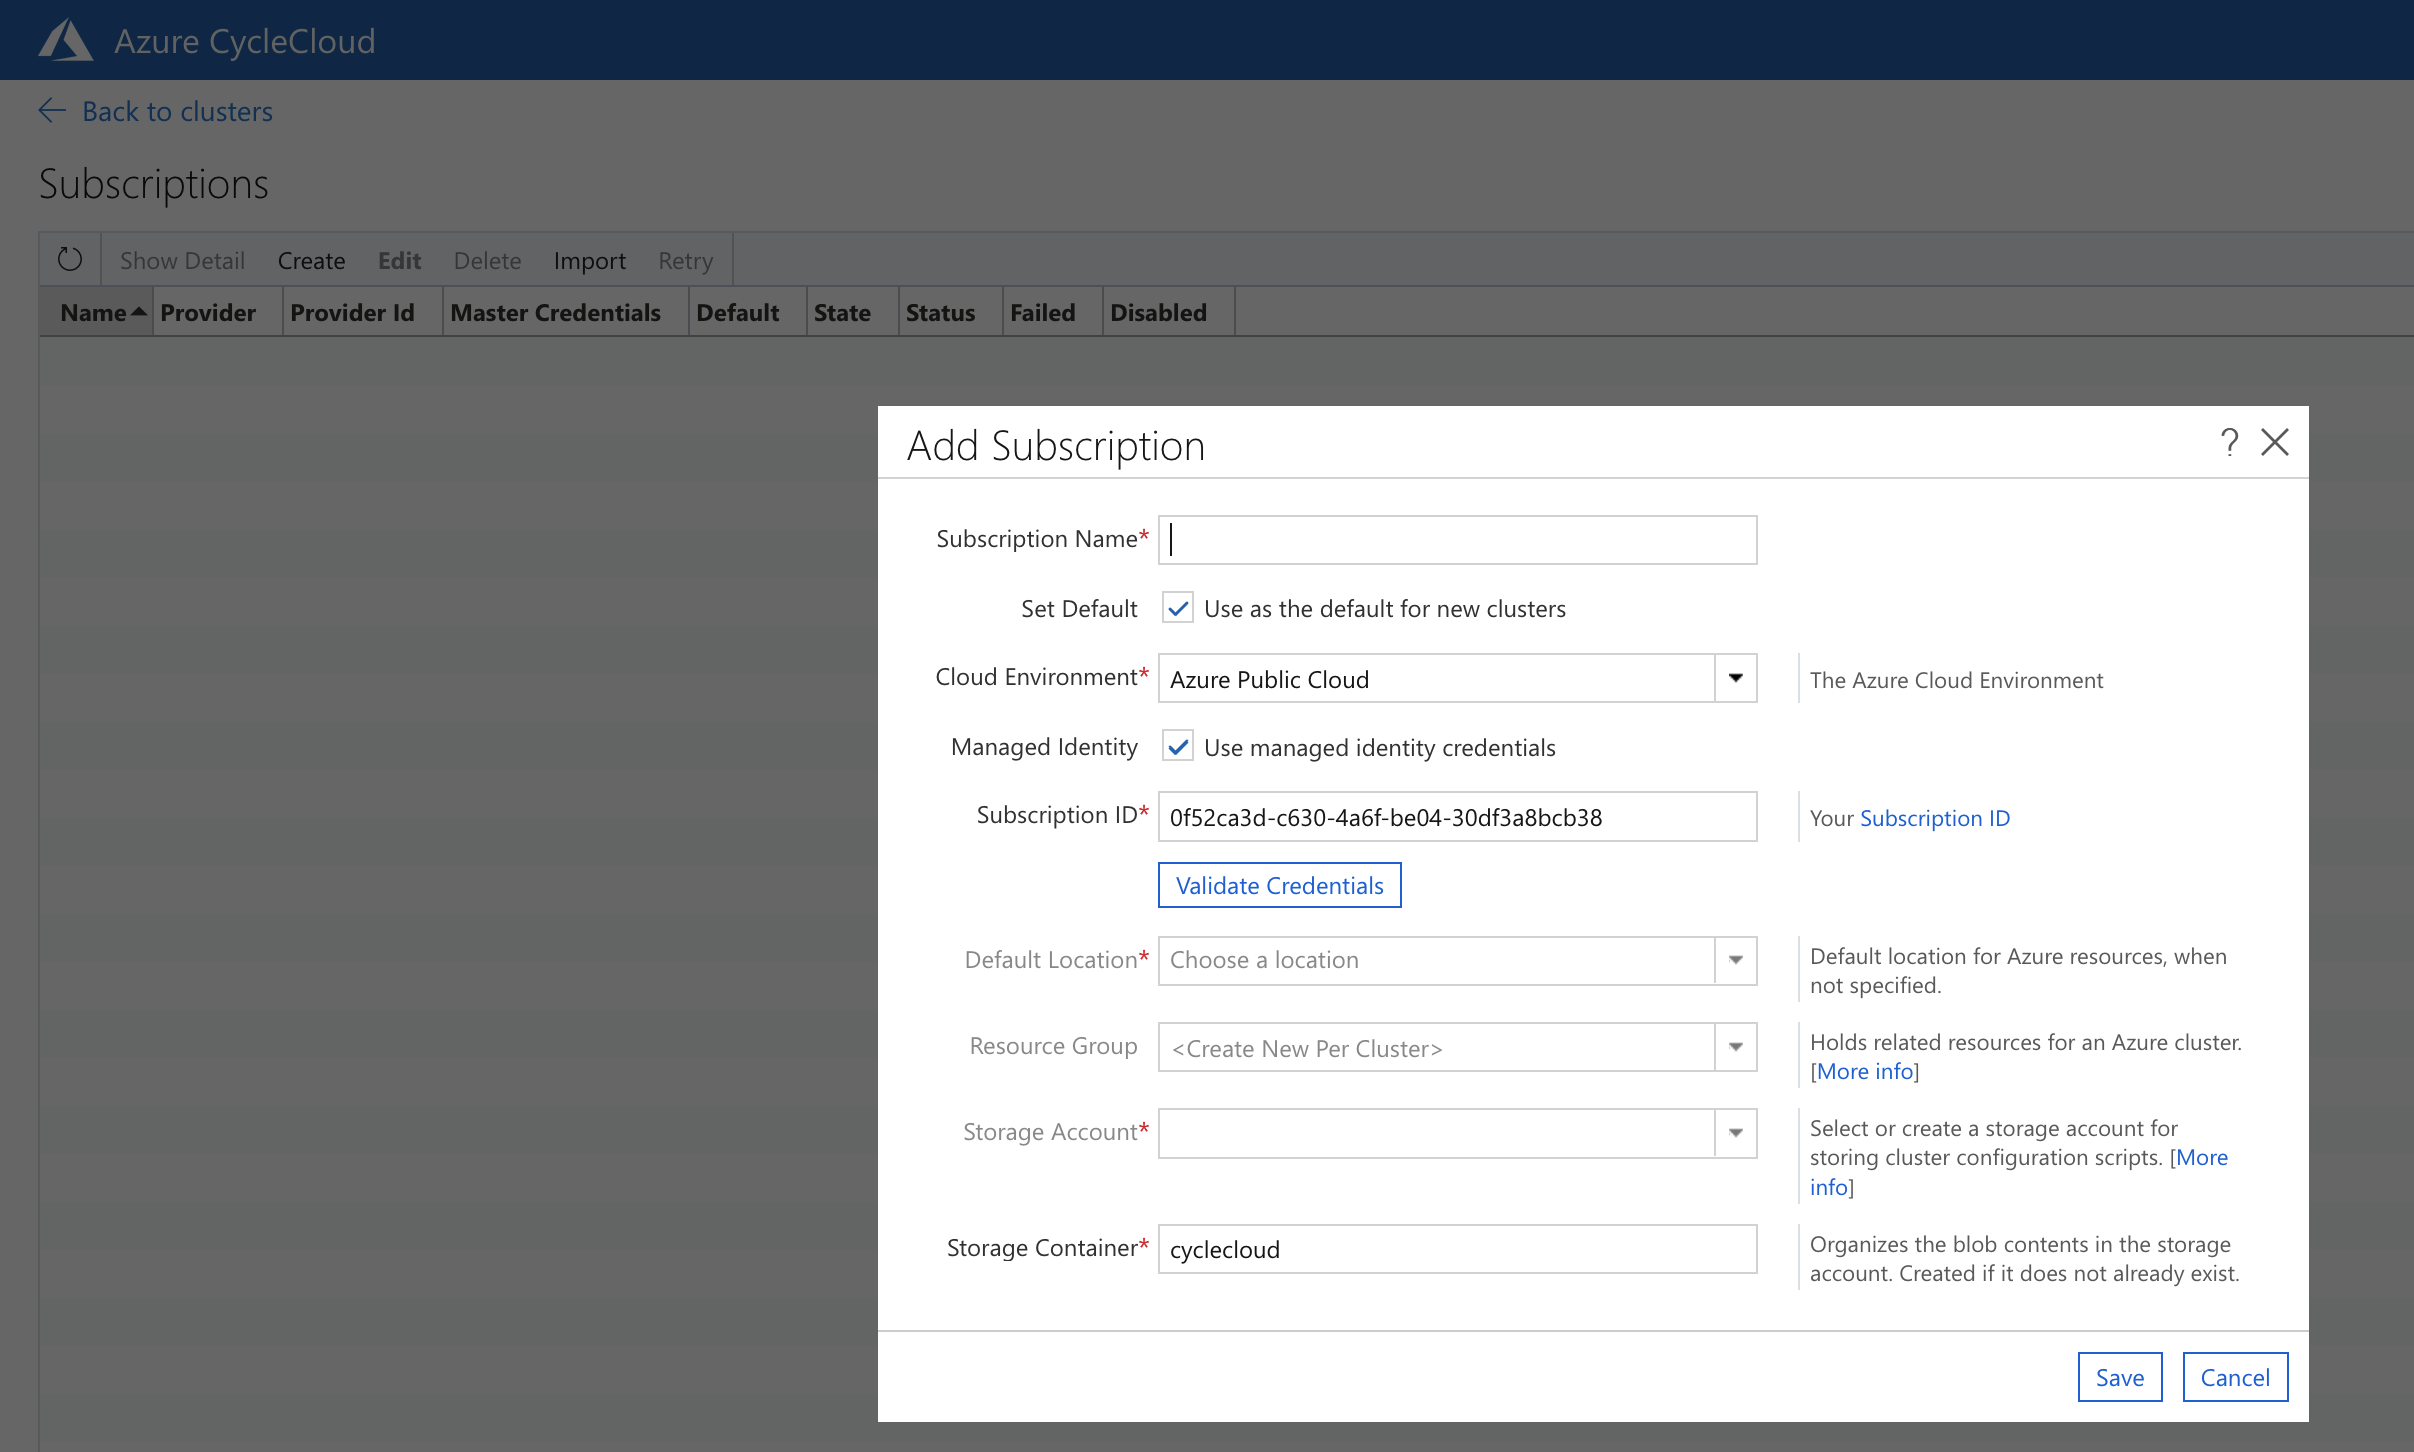
The Subscriptions page will show if the cluster subscription was created. You may need to pull the State window to enlarge it.
When it says created, with nothing under the Failed column, then it was successful, click Back to Clusters.
Figure 18. Check Cluster Creation Status in Subsriptions Table

Figure 19. Azure CycleCloud Create a New Cluster - Select SLURM workload Manager
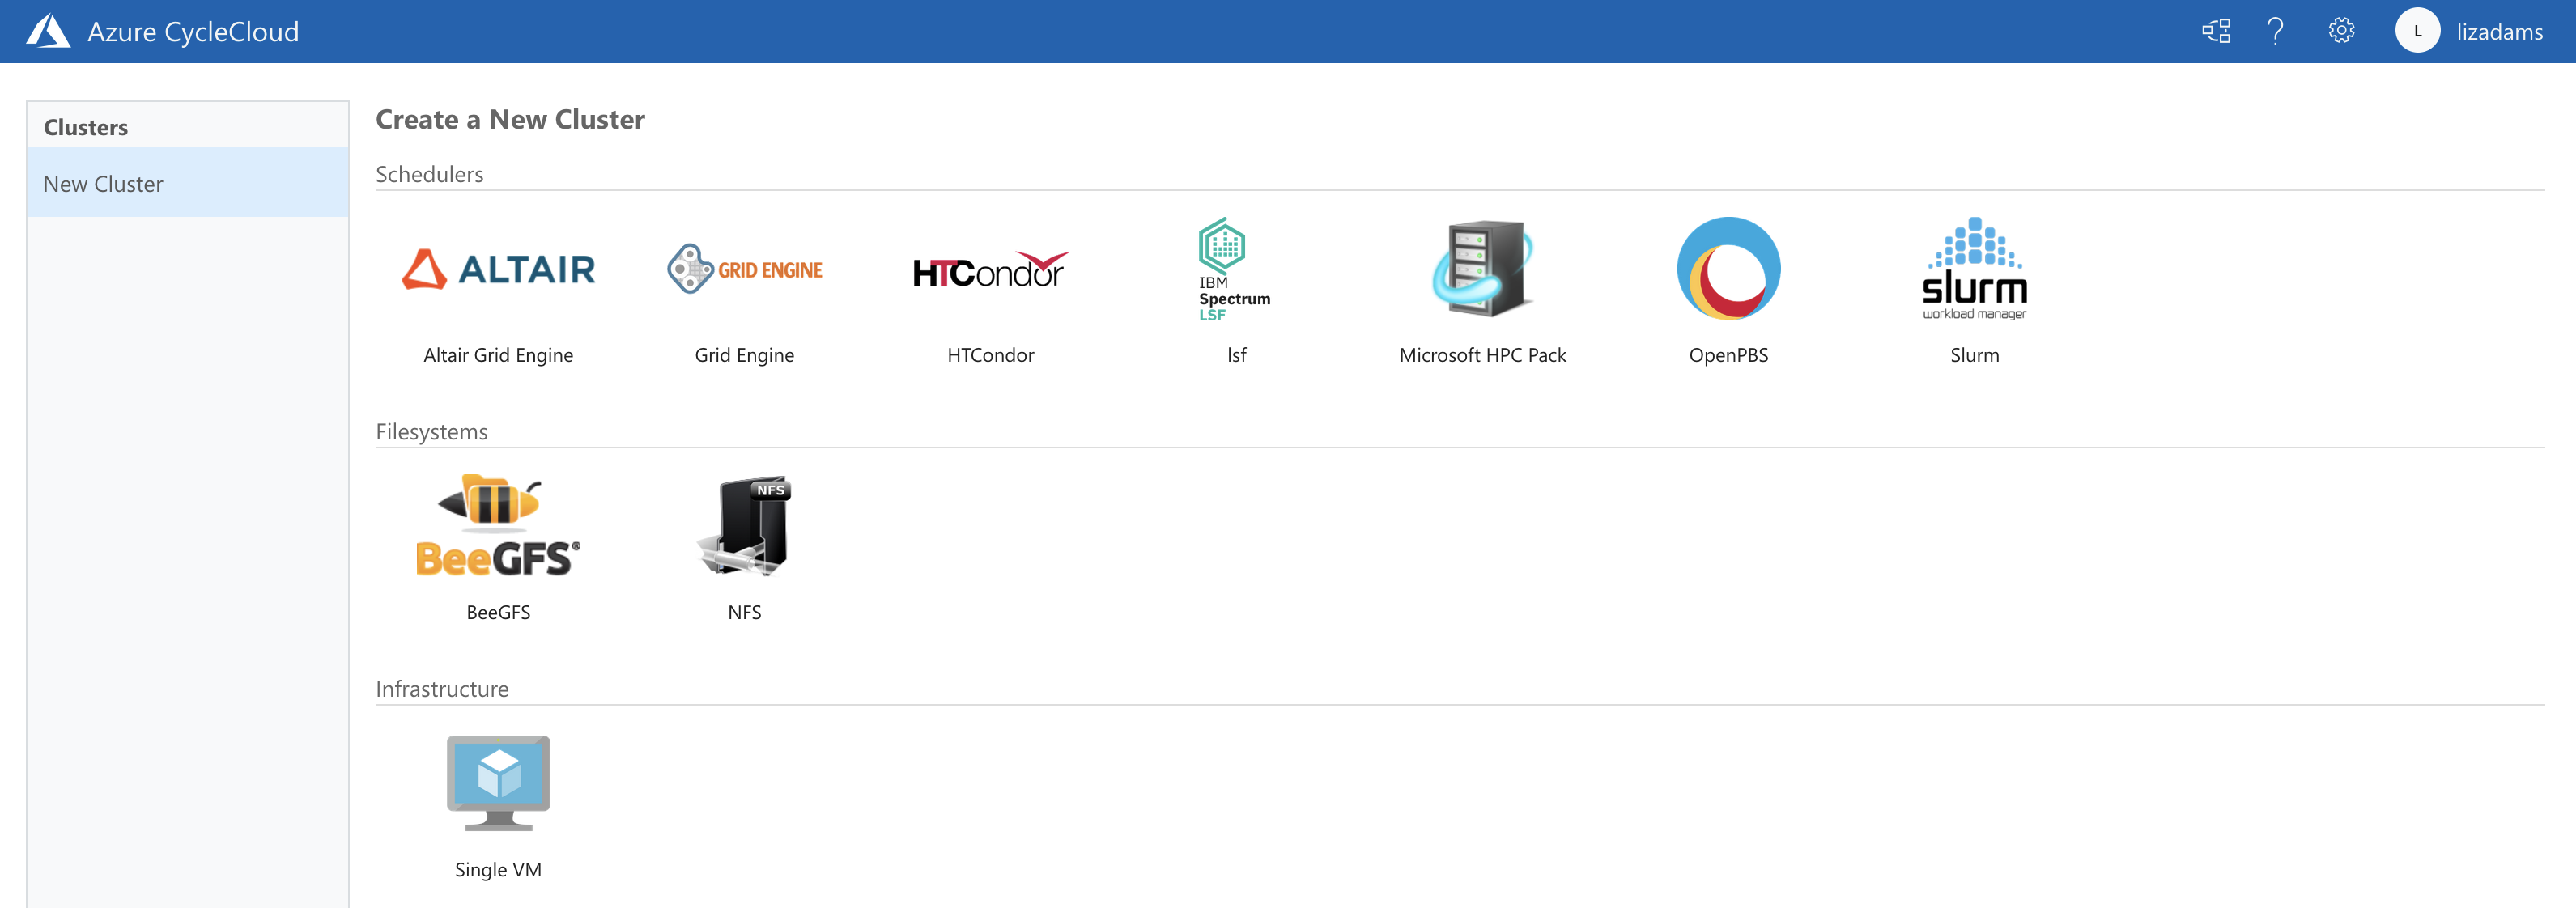
Figure 20. Azure CycleCloud New Slurm Cluster - add a Cluster Name
Example name: CMAQSlurmHC44rsAlmaLinux
Figure 21. Azure CycleCloud HPC Queue Select Machine
In the Compute Type, select High Performance Compute
Select HB120rs_v3, then select Apply

Figure 22. Select Max HPC Cores
Select Auto-Scaling Max HPC Cores to be a multiple of the number of cpus available on the compute node. For HB120rs_v3 for a maximum of 4 nodes, it would be 120 x 4 = 480 Max HPC Cores Choose the Networking SubnetID that was created for the CycleCloud.
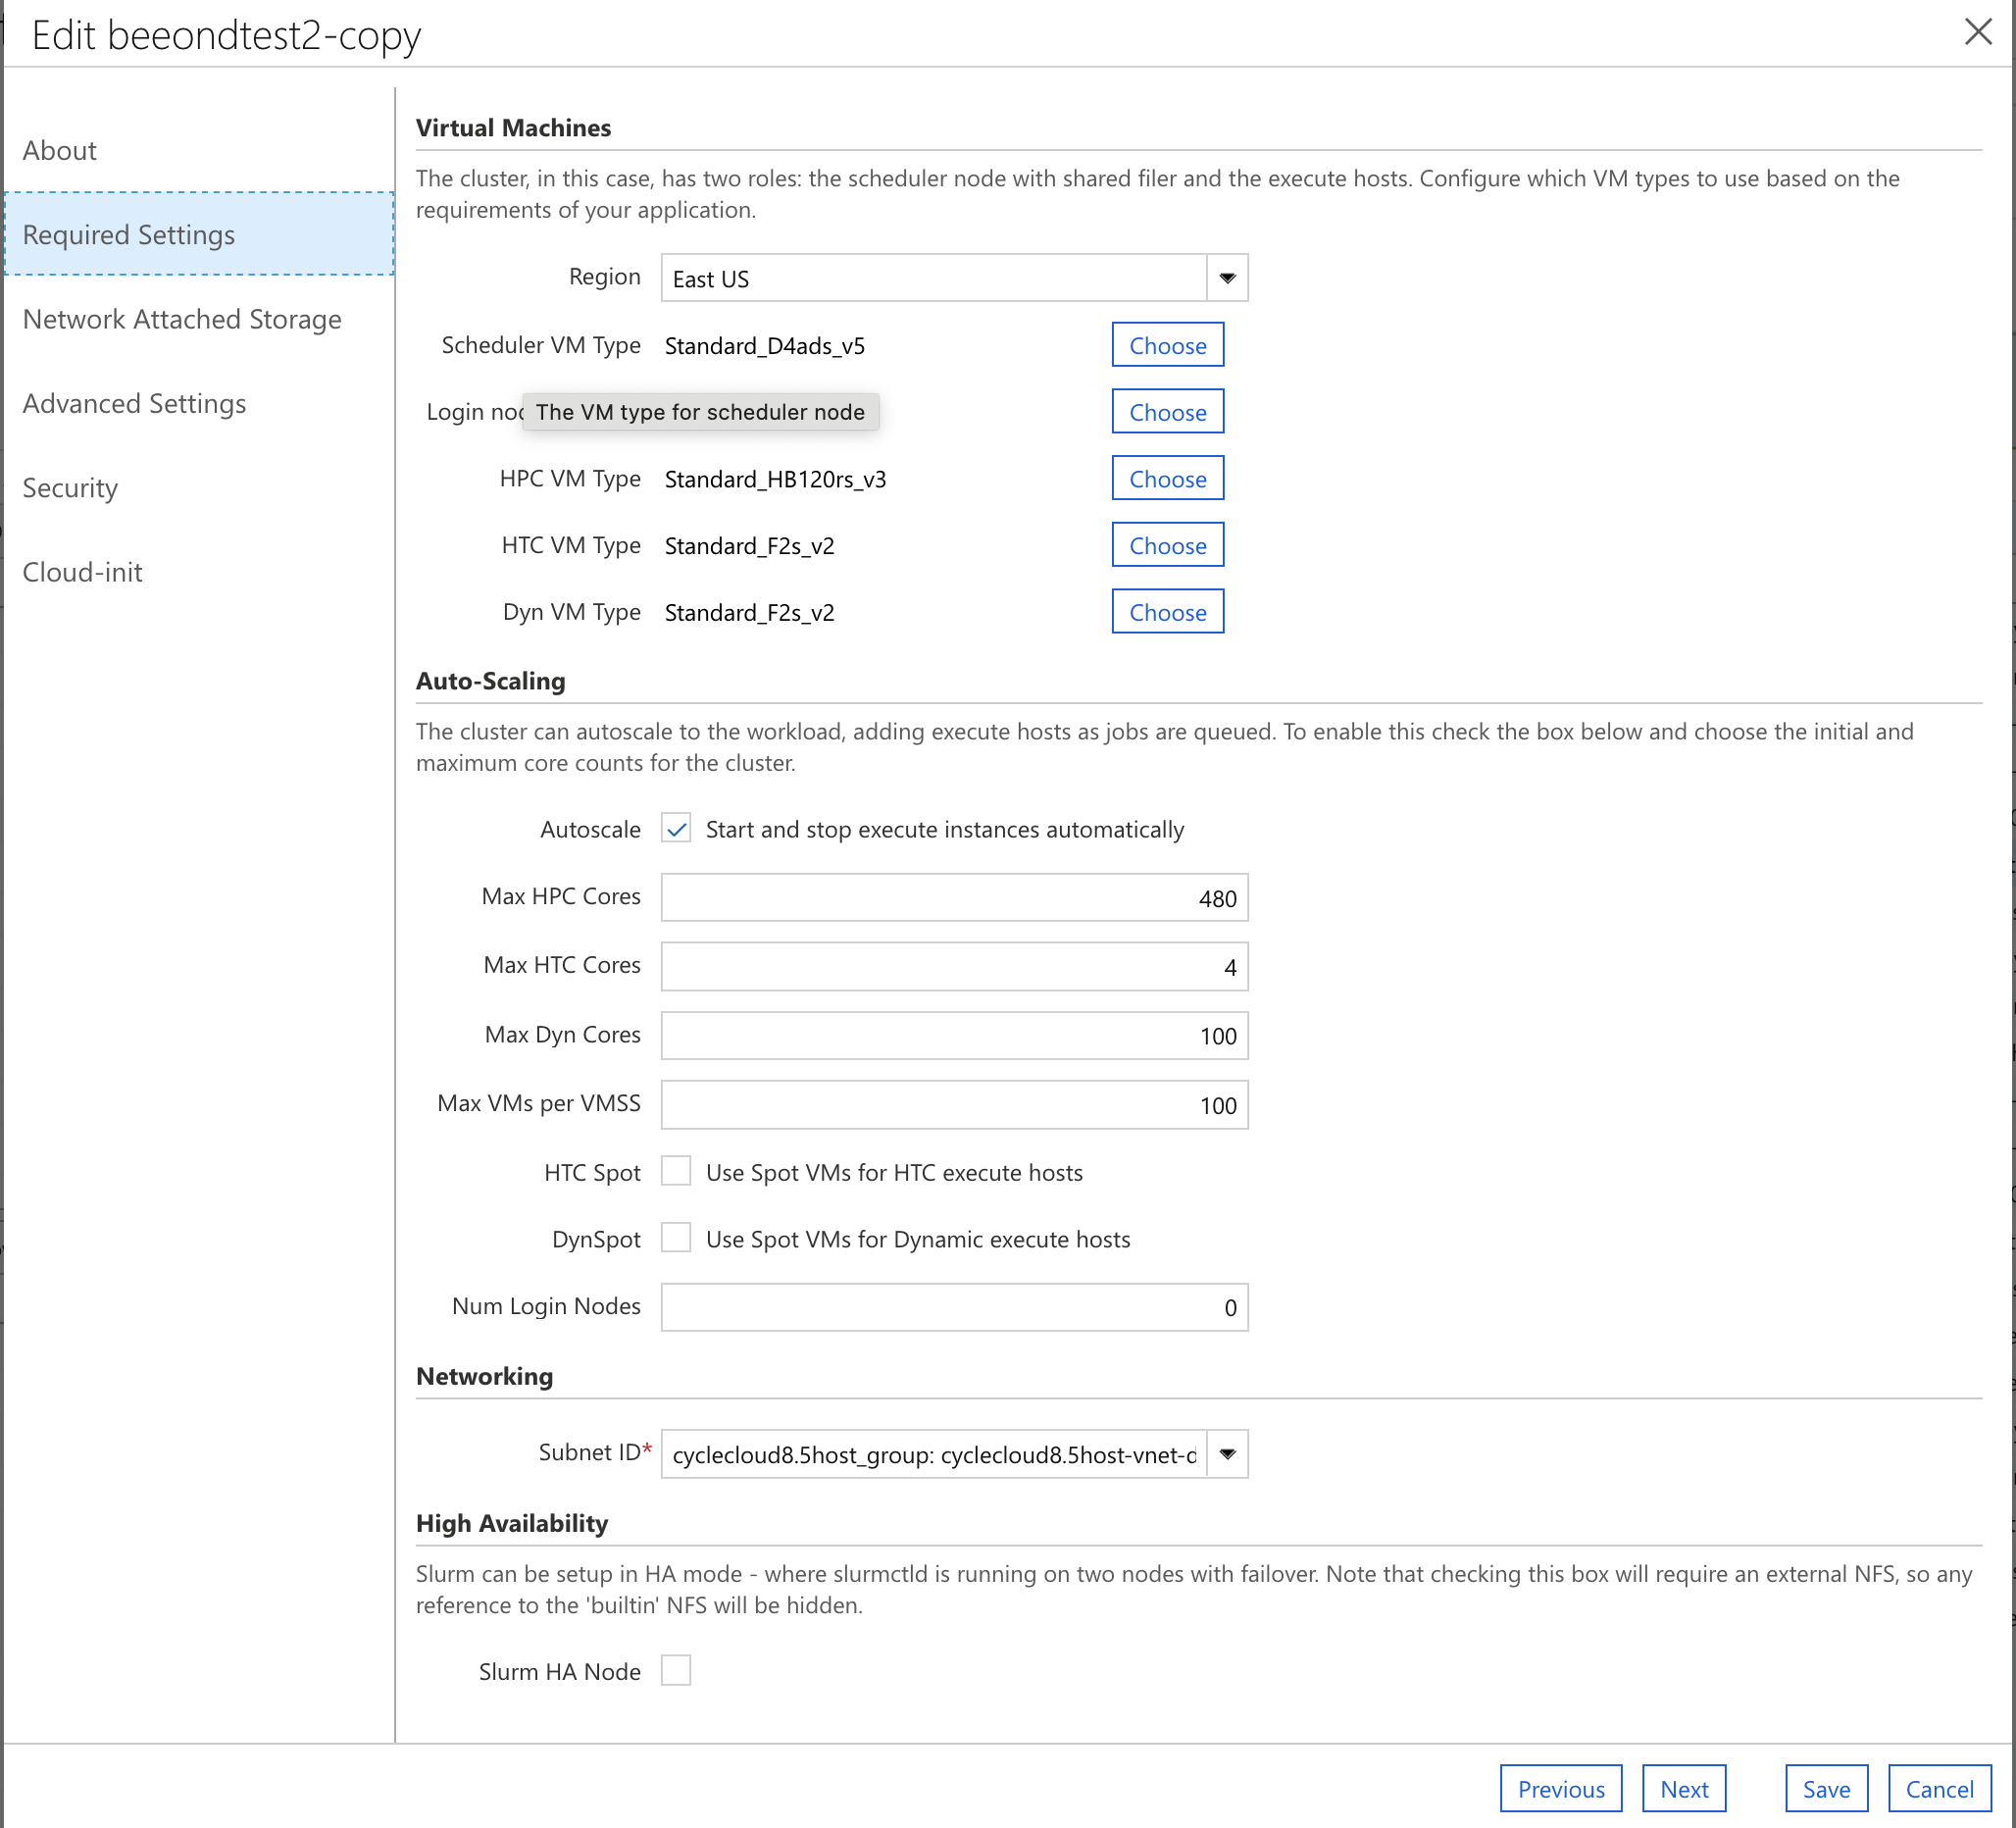
Figure 23. Azure CycleCloud Network Attached Storage
Change the size from 100 GB of network attached storage to 1000 GB of network attached storage for the /shared directory, where CMAQ and the input data will be installed.
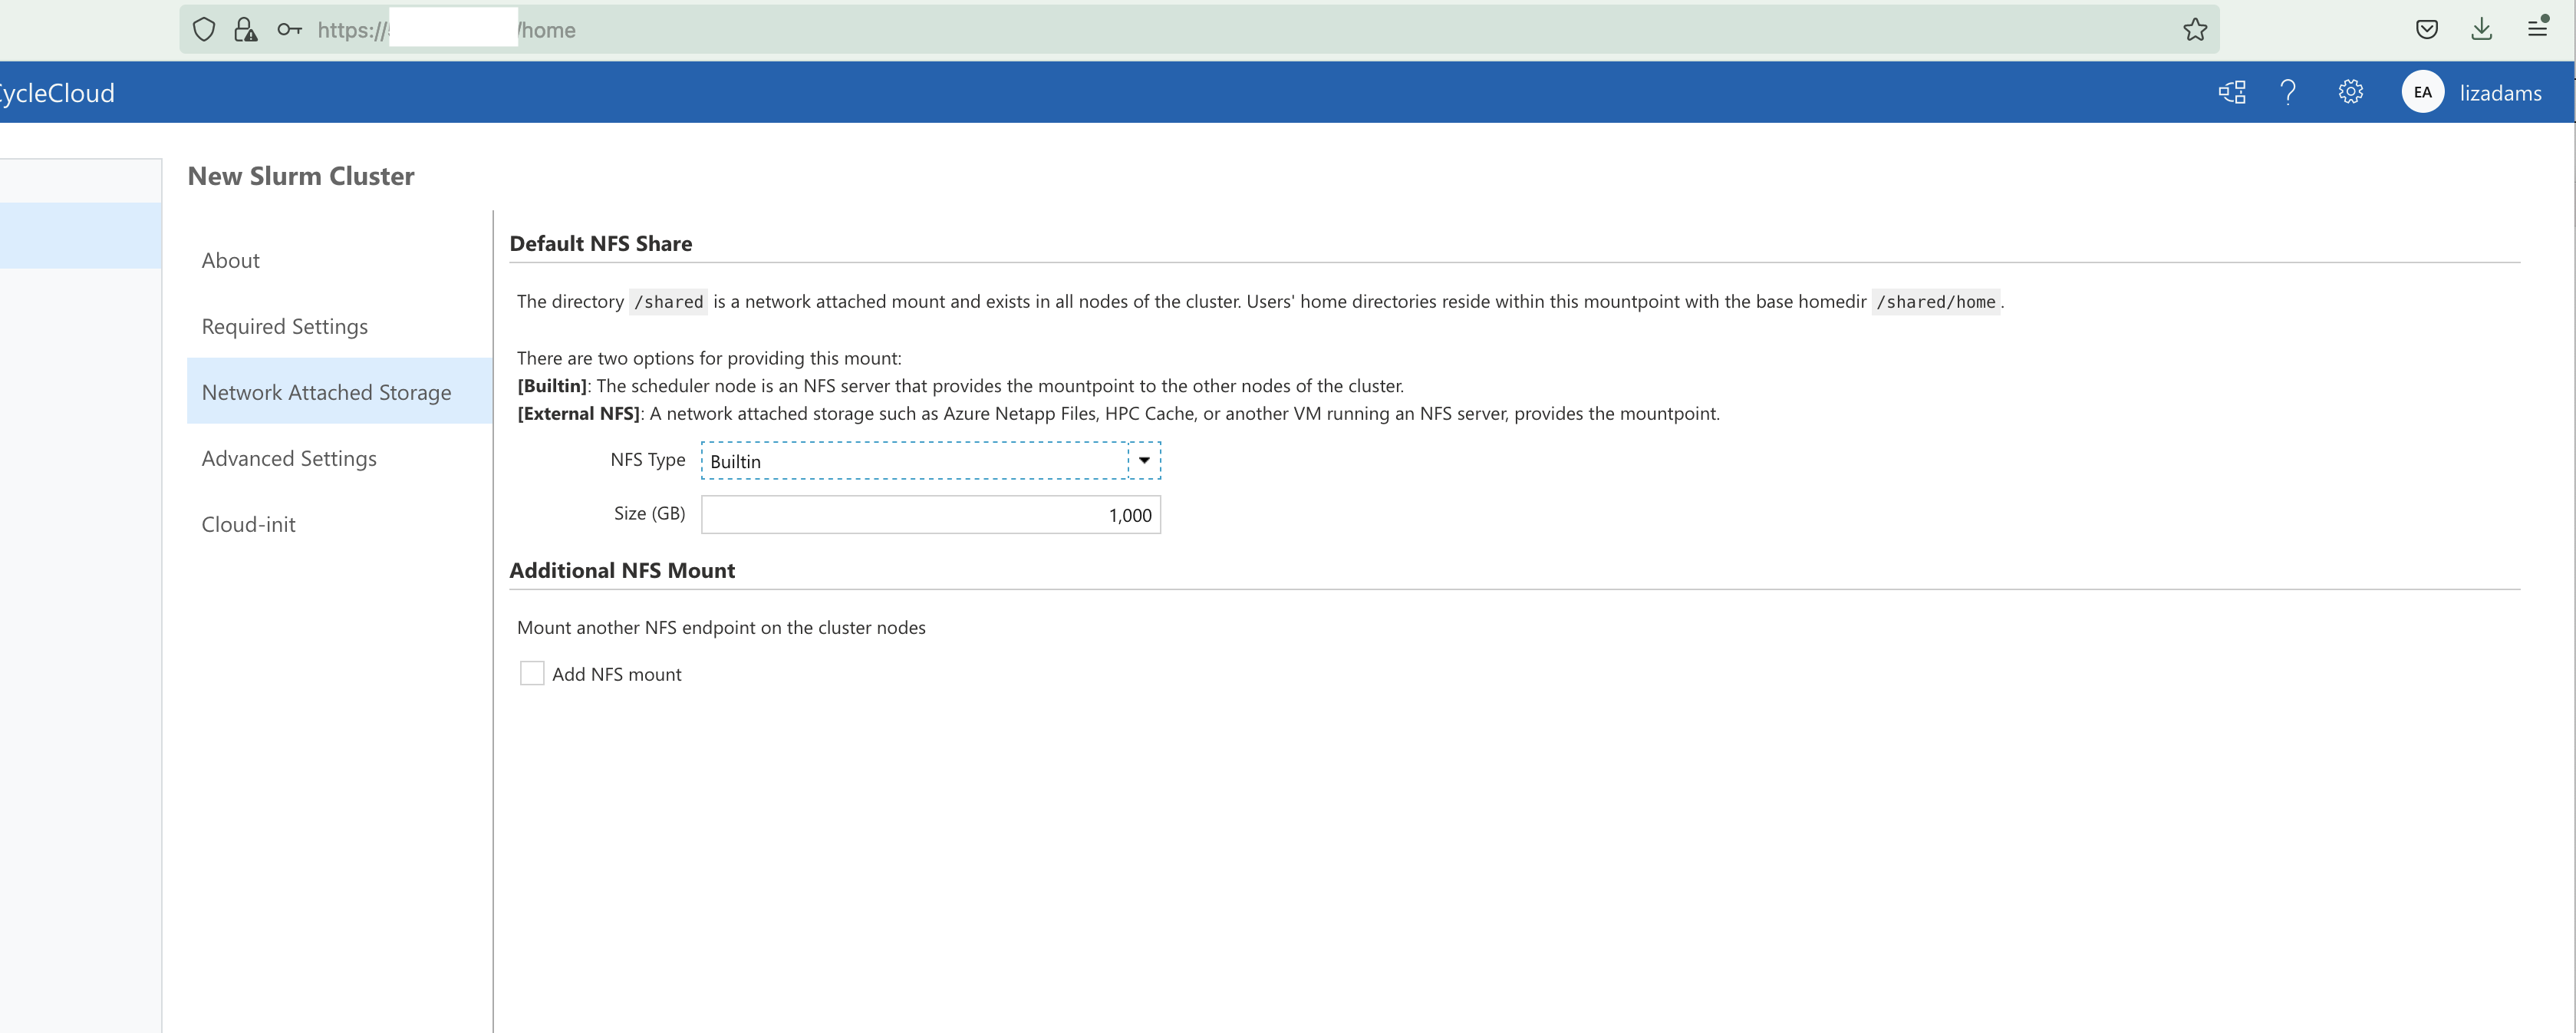
Figure 24. Azure CycleCloud Select OS and Uncheck Name as HostName

Figure 25. Azure CycleCloud Select Machine Type for HPC Node
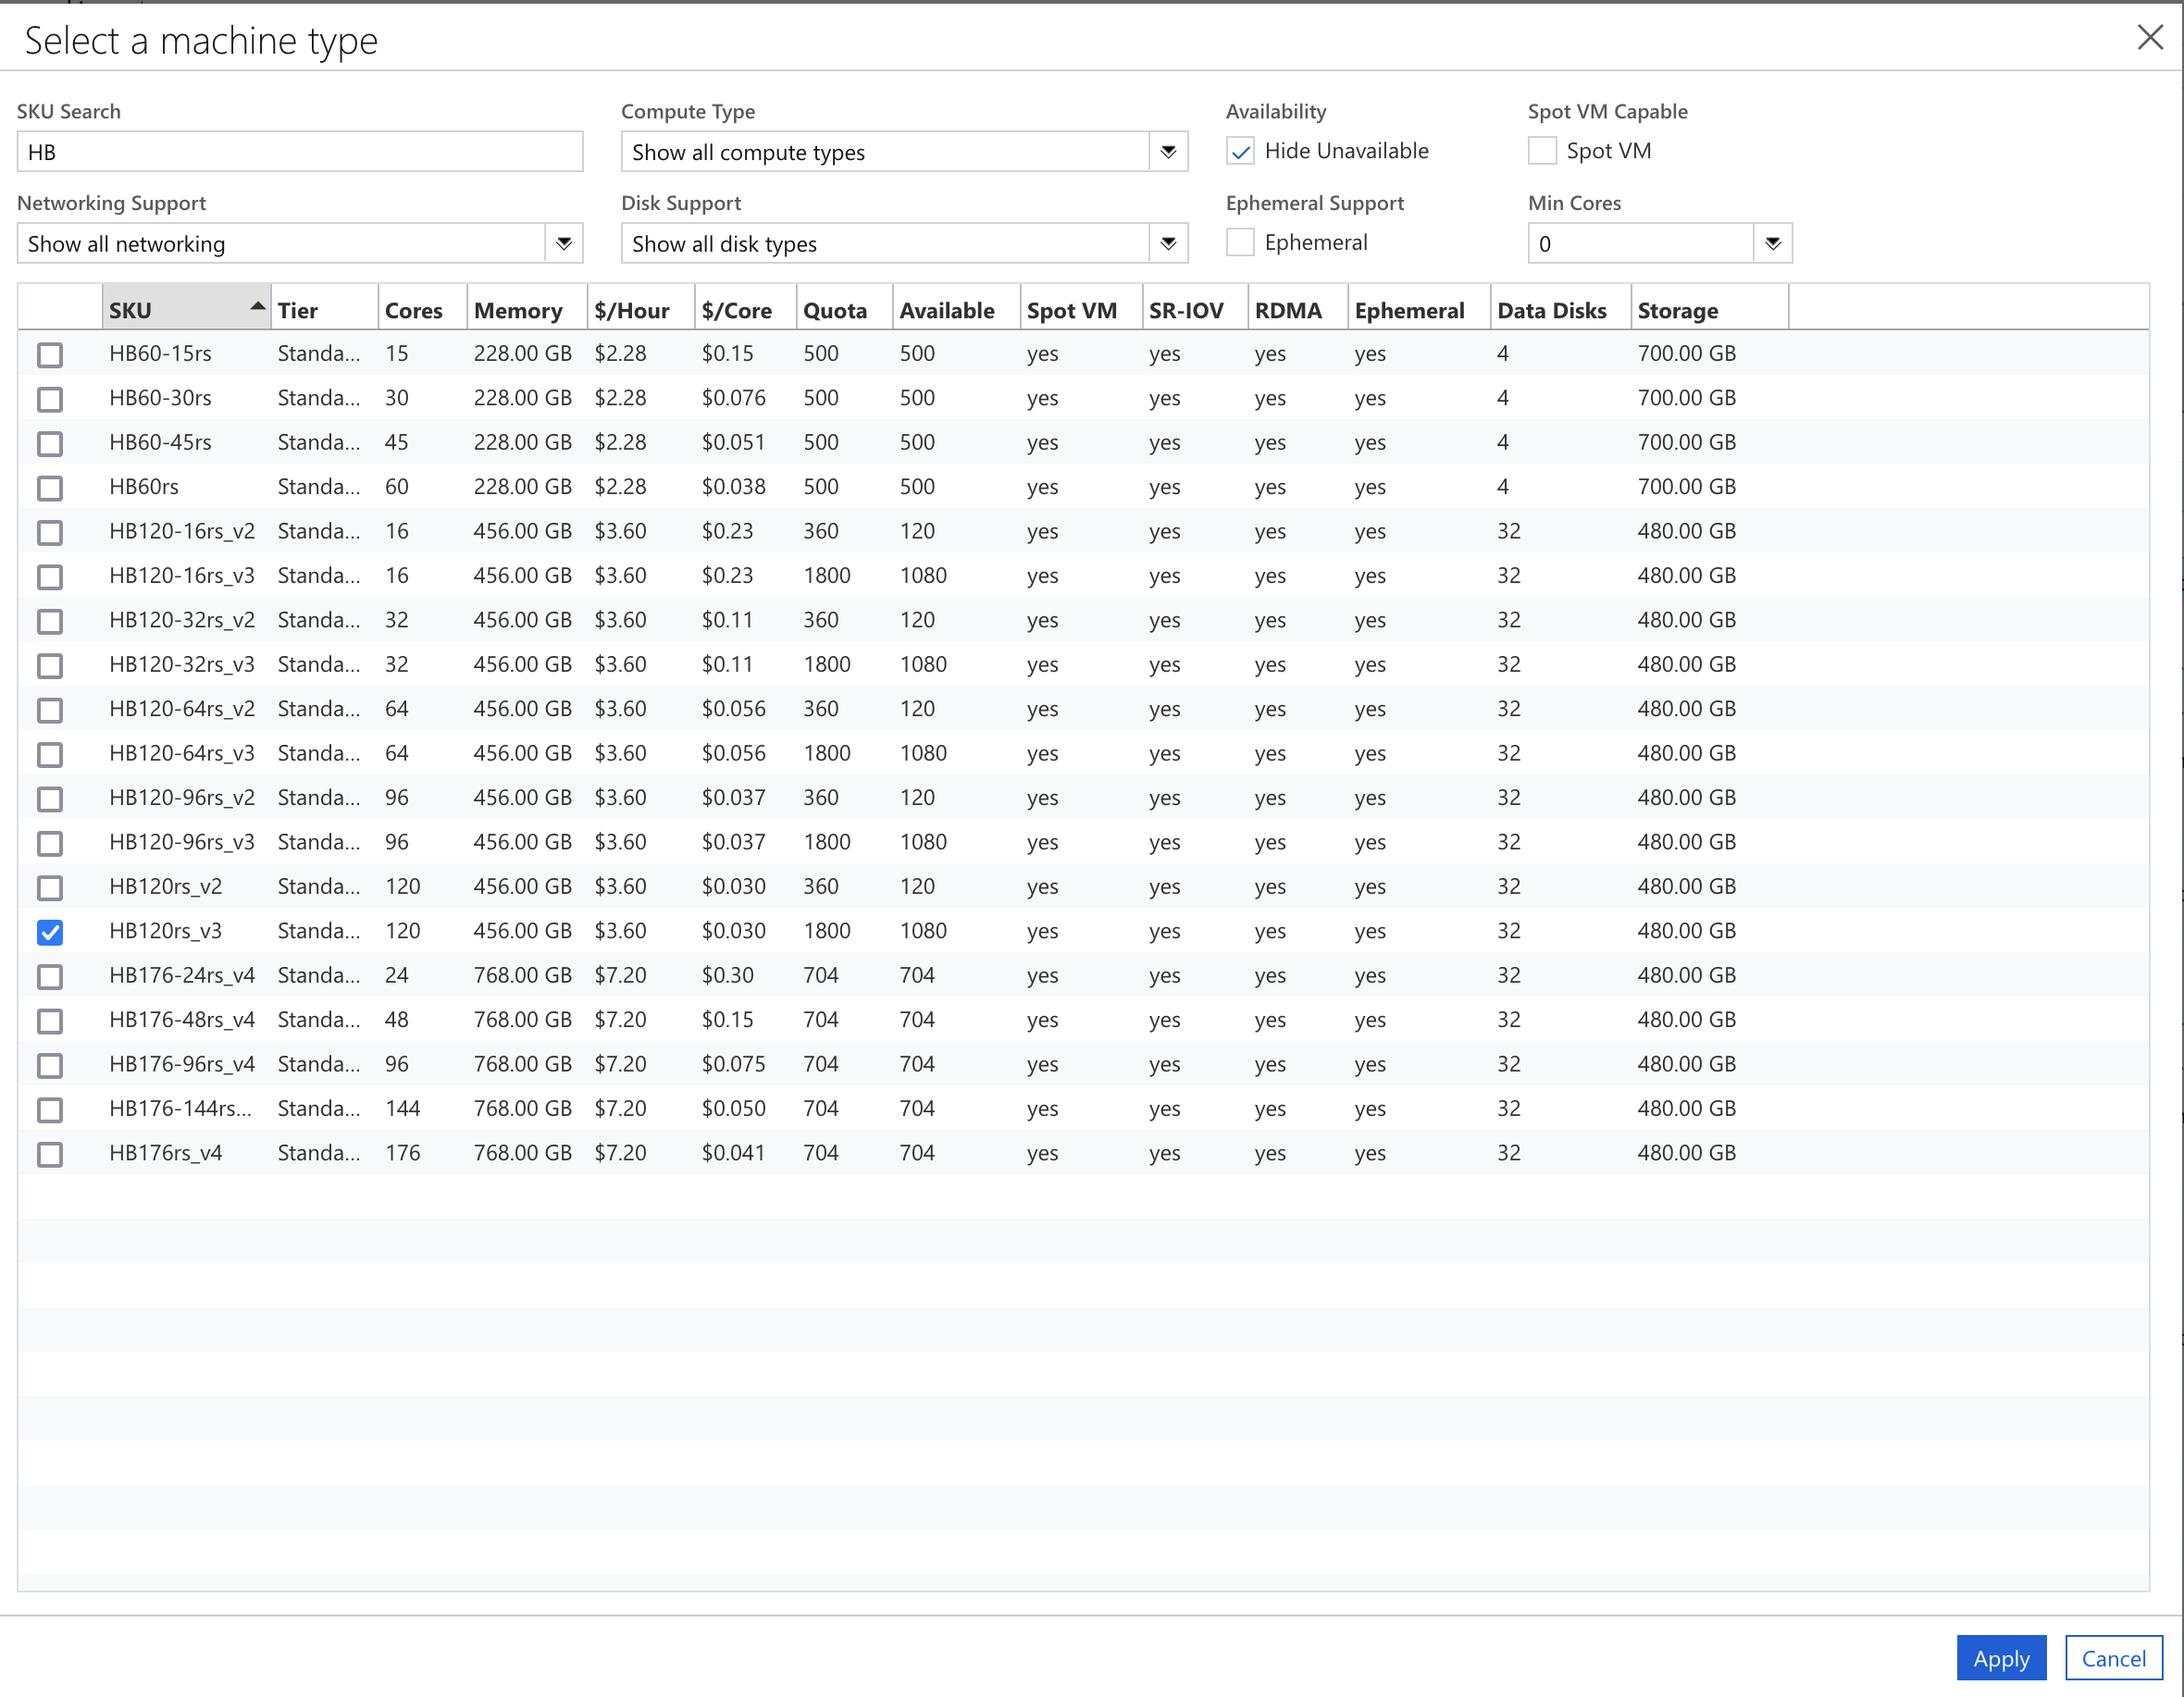
Figure 26. Azure Cycle Cloud Required Settings HPC VM Select HC44rs

Note: the maximum number of CPUs specified for the HPC Compute node can be changed after the cluster has been created. See section 4.1.4 for the command line commands.
Figure 27. Azure Cycle Cloud Subscriptions Registering Service Providers

Figure 28. Azure cycle Cloud Subscription Created Successsfully
Figure 29. Azure cycle cloud Nodes Tab Shows Status of Scheduler
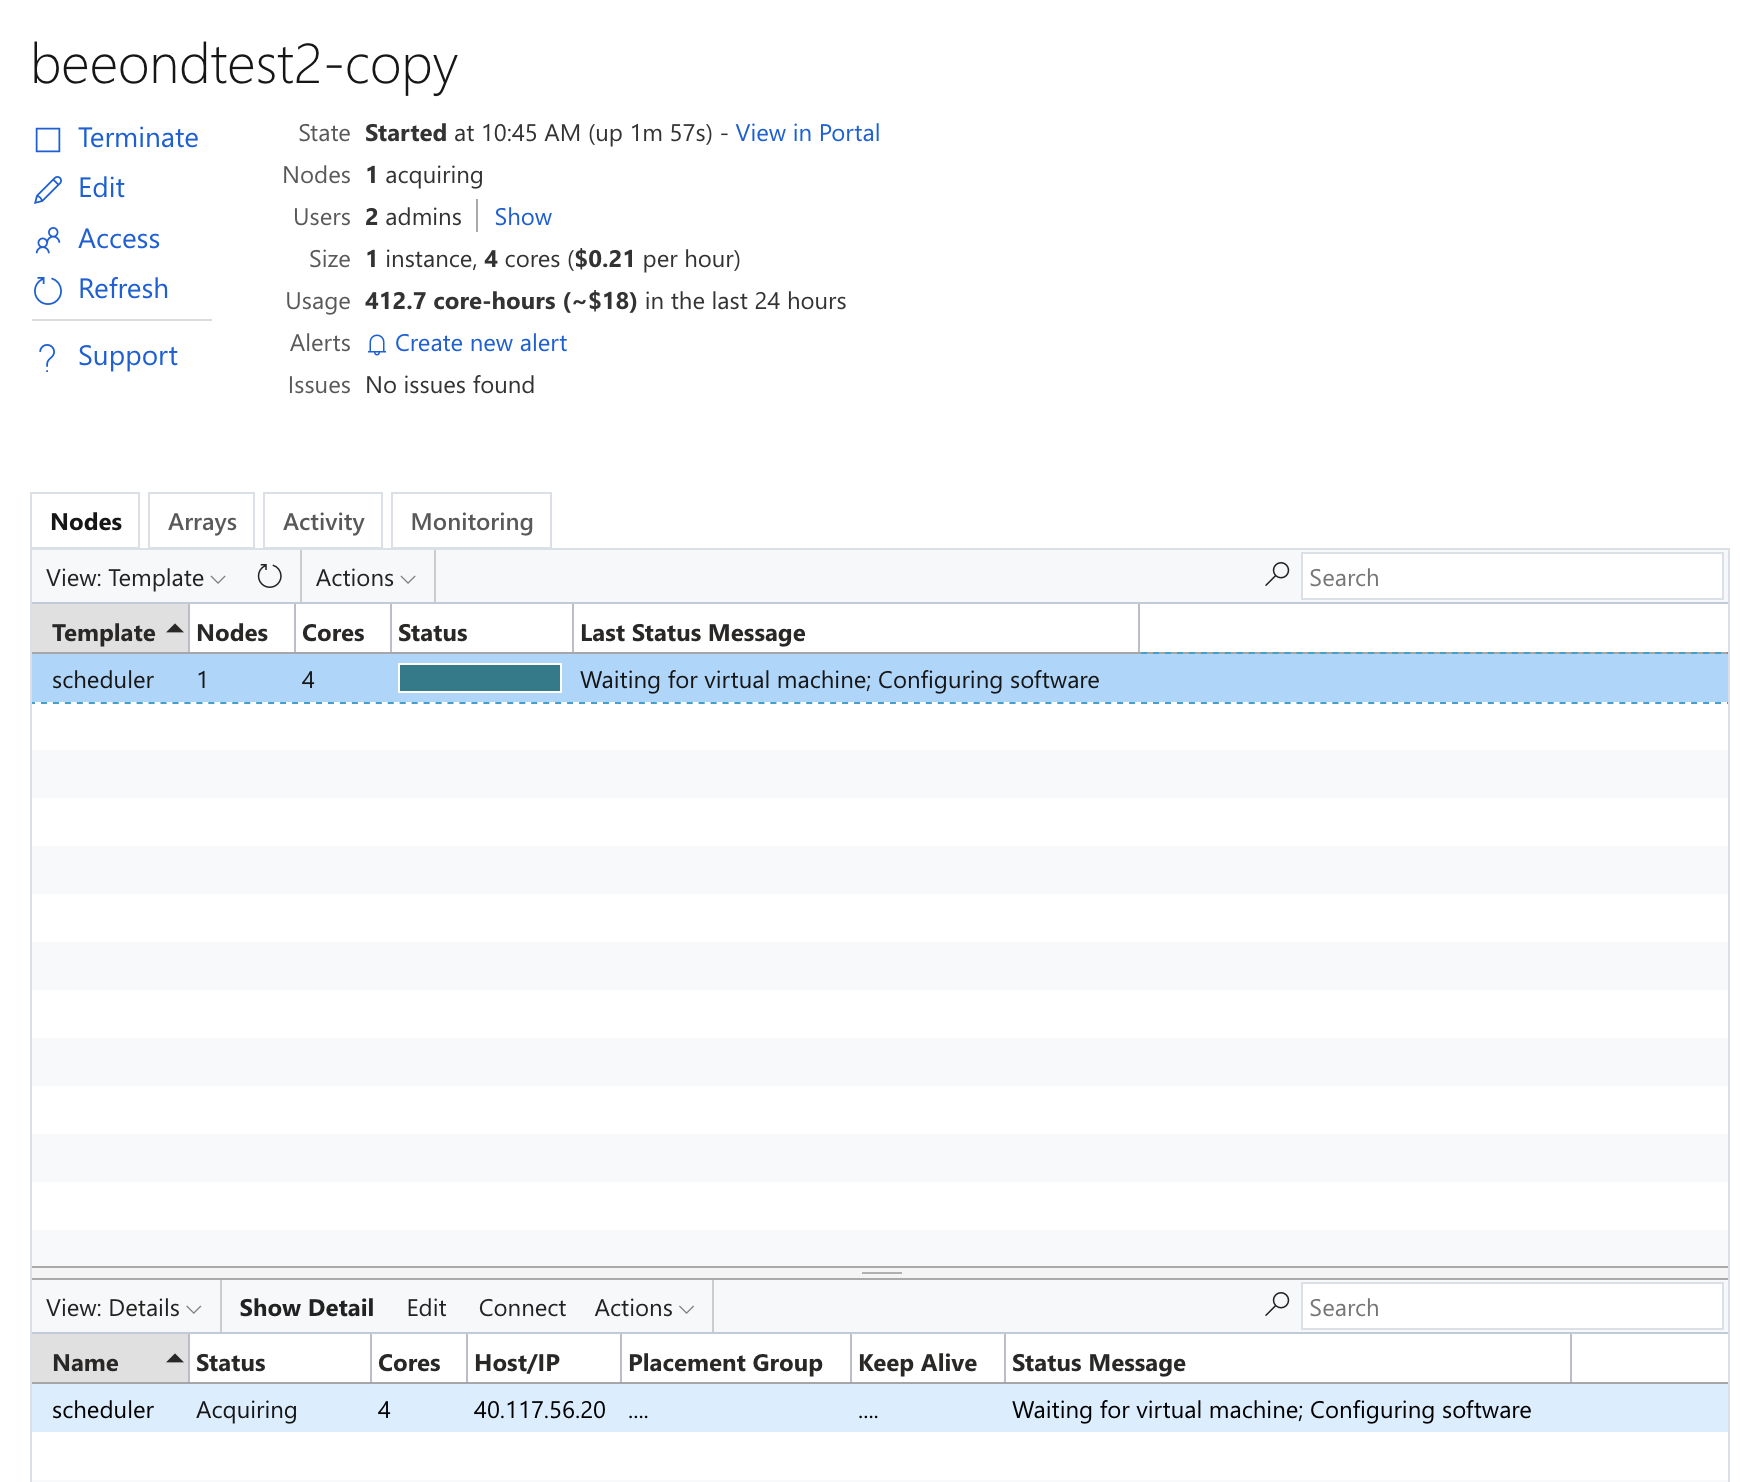
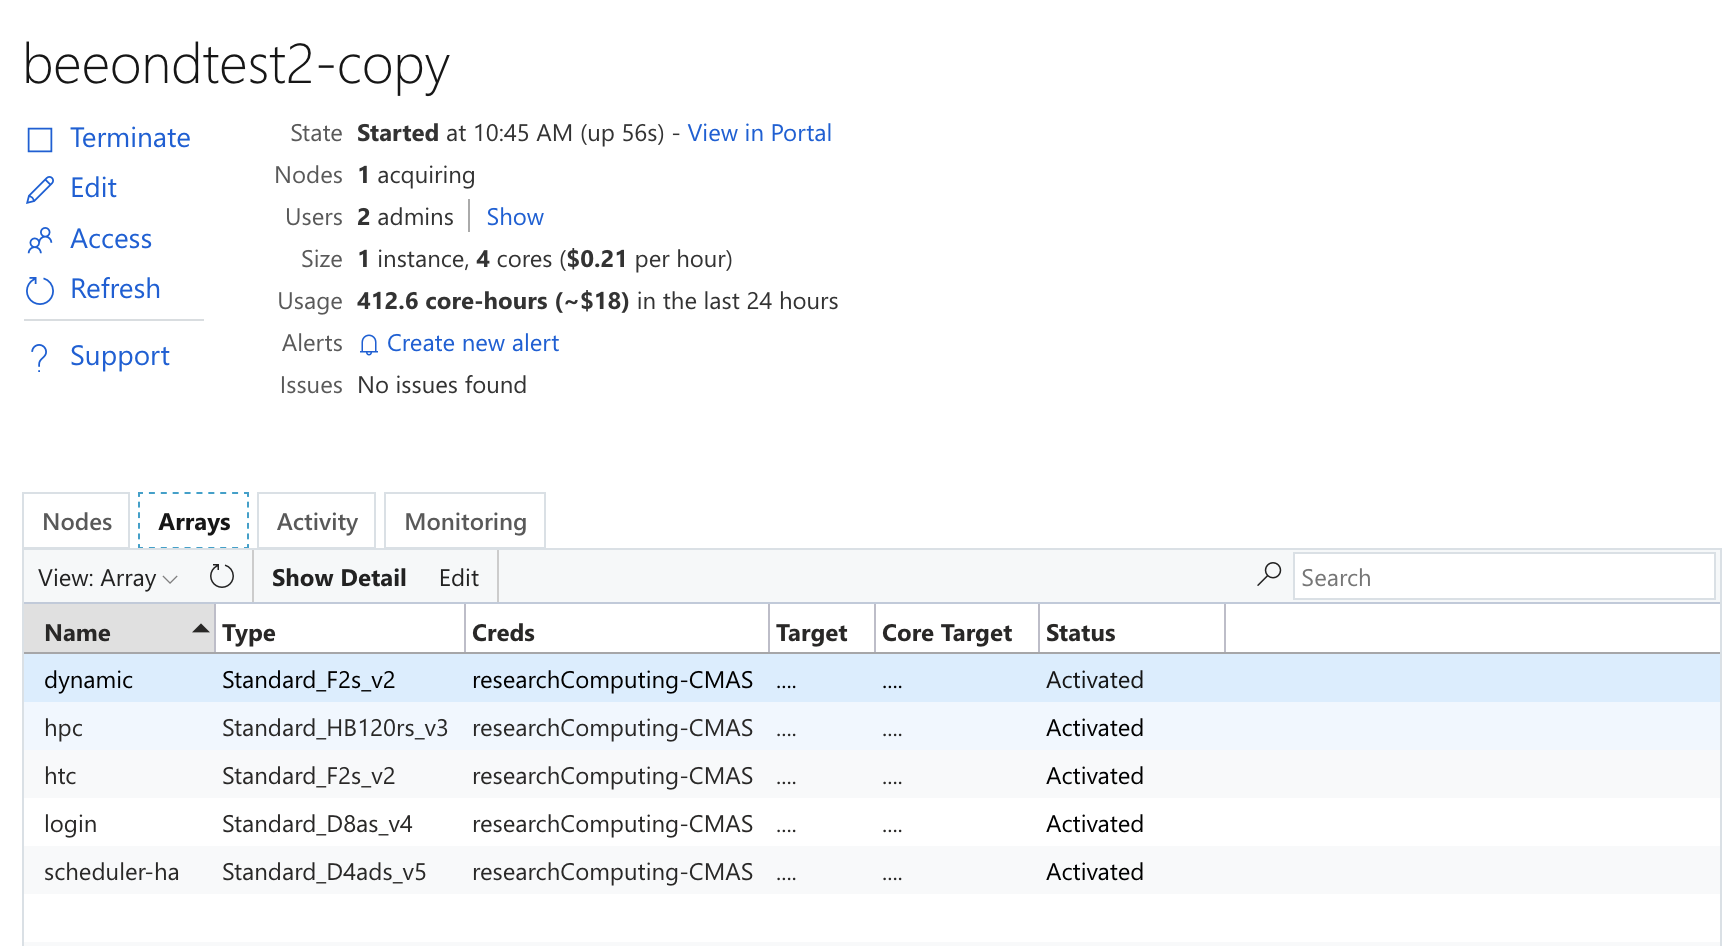
Figure 30. Azure Cycle Cloud Cluster Arrays Tab Shows HPC Queue Machine Type
Azure Cycle Cloud Start Cluster In the Nodes table, it will say scheduler 1 node, 4 cores, Status Message: Staging Resources
Login to Azure Cycle Cloud and verify that the following command works.
Click on the Scheduler node, and obtain the IP address, then login using
ssh -Y $USER@IP-ADDRESS
Run a bash script for 1 minute by submitting to the hpc node using srun.
srun -t 1:00 -n 2 --pty /bin/bash
You should see the hpc acquiring a single node.
Figure 31. Azure CycleCloud Acquiring Compute Node after running srun command.
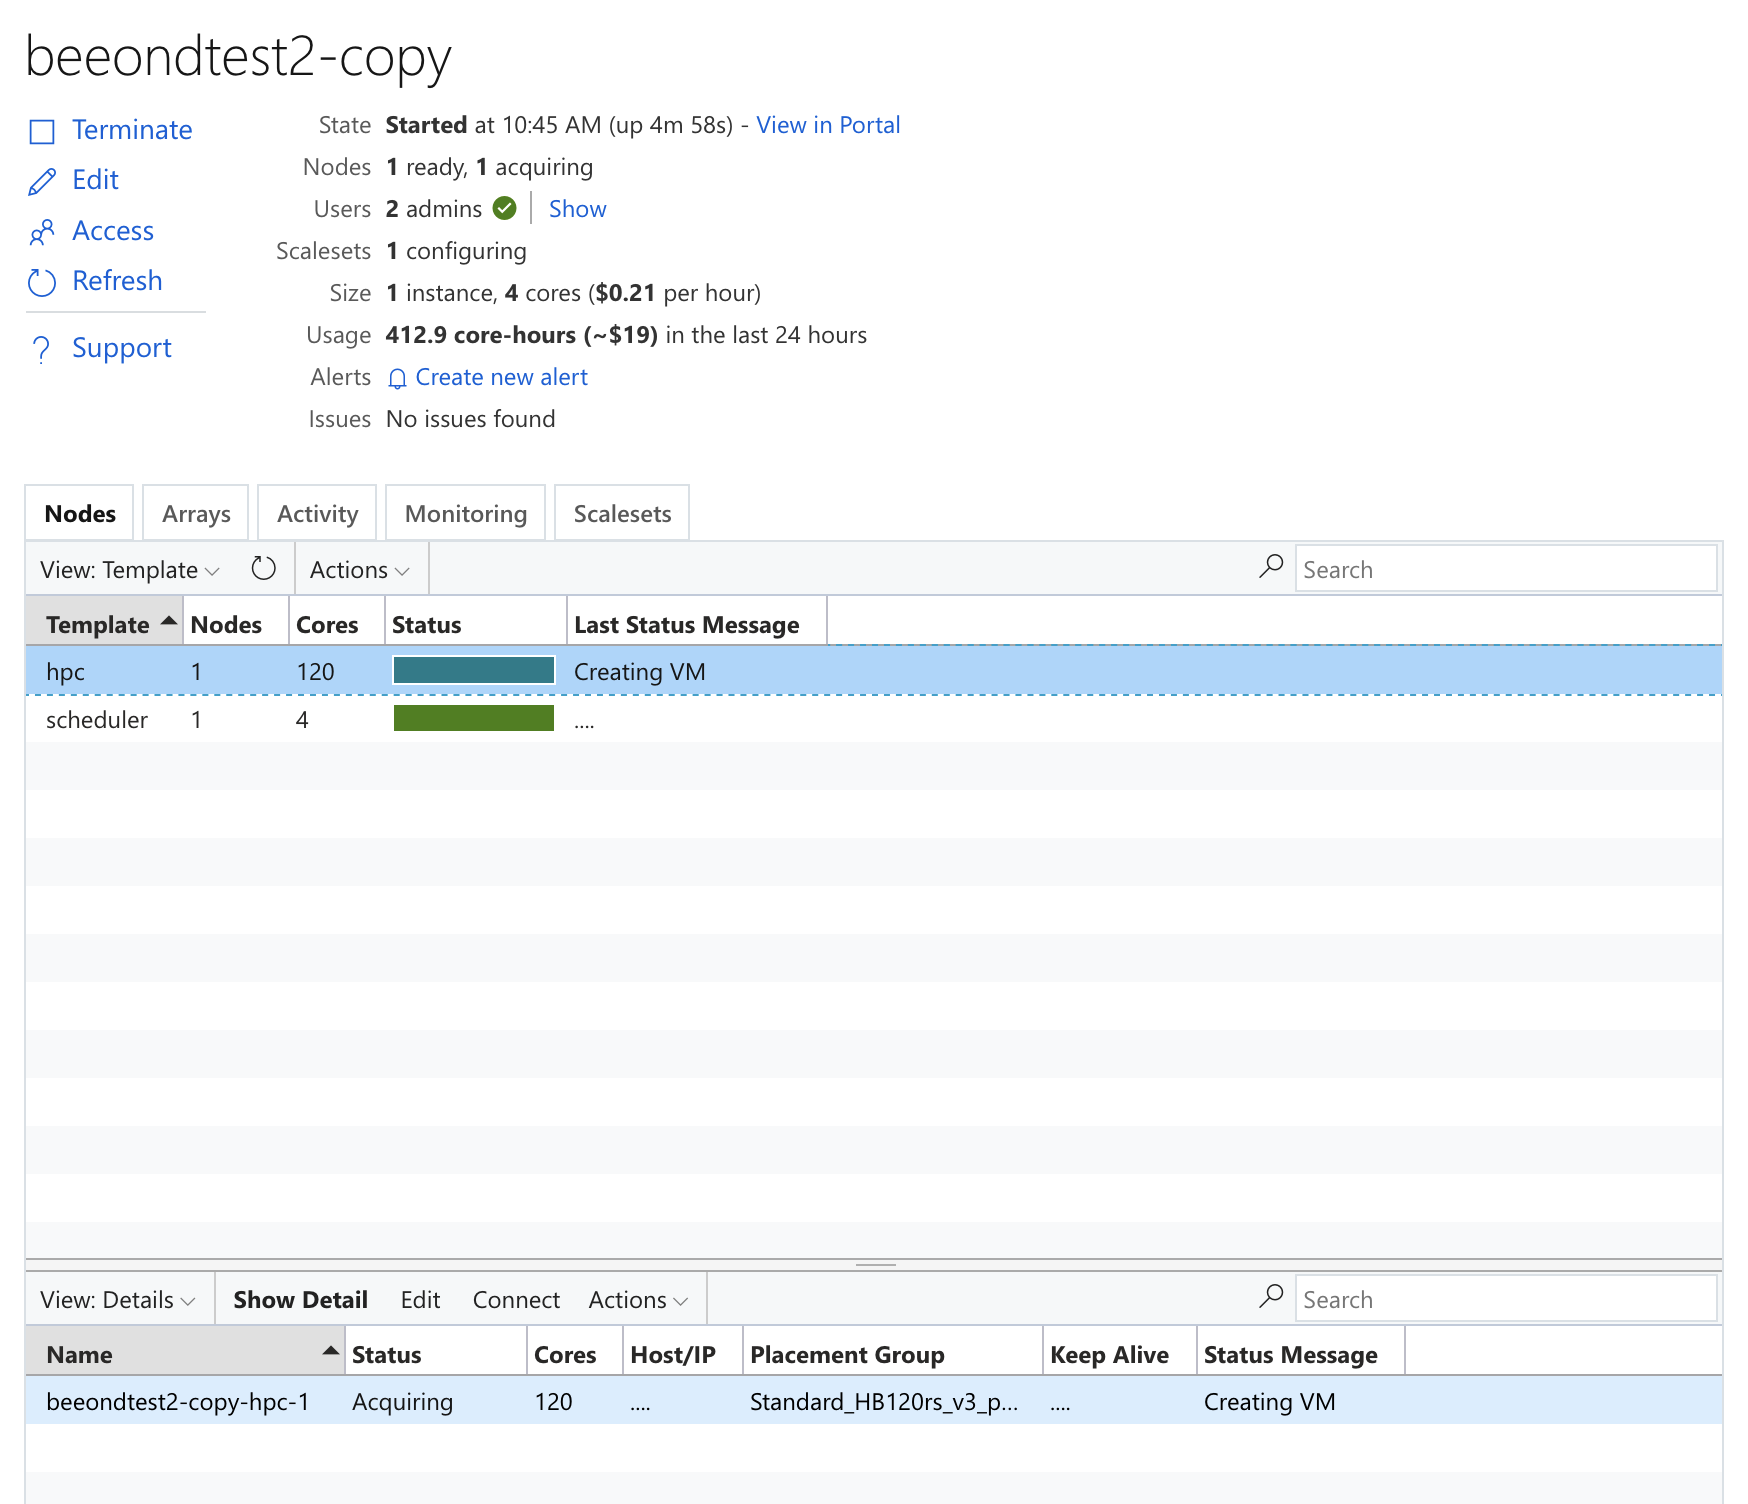
After the compute node is created and the srun command is completed, the compute node will be shut down automatically, after it has been idle for a period of time.
You can use the slurm commands to monitor the status of the compute nodes.
qstat
Job id              Name             Username        Time Use S Queue
------------------- ---------------- --------------- -------- - ---------------
2                   bash             lizadams        00:00:05 R hpc
for additional detail:
qstat -f
Output:
Job Id:	2
	Job_Name = bash
	Job_Owner = lizadams@beeondtest2-copy-scheduler
	interactive = True
	job_state = R
	queue = hpc
	qtime = Thu Mar  7 16:14:22 2024
	mtime = Thu Mar  7 16:14:22 2024
	ctime = Thu Mar  7 16:15:22 2024
	exec_host = beeondtest2-copy-hpc-1/2
	Priority = 4294901758
	euser = lizadams(20001)
	egroup = lizadams(20001)
	Resource_List.walltime = 00:01:00
	Resource_List.nodect = 1
	Resource_List.ncpus = 2
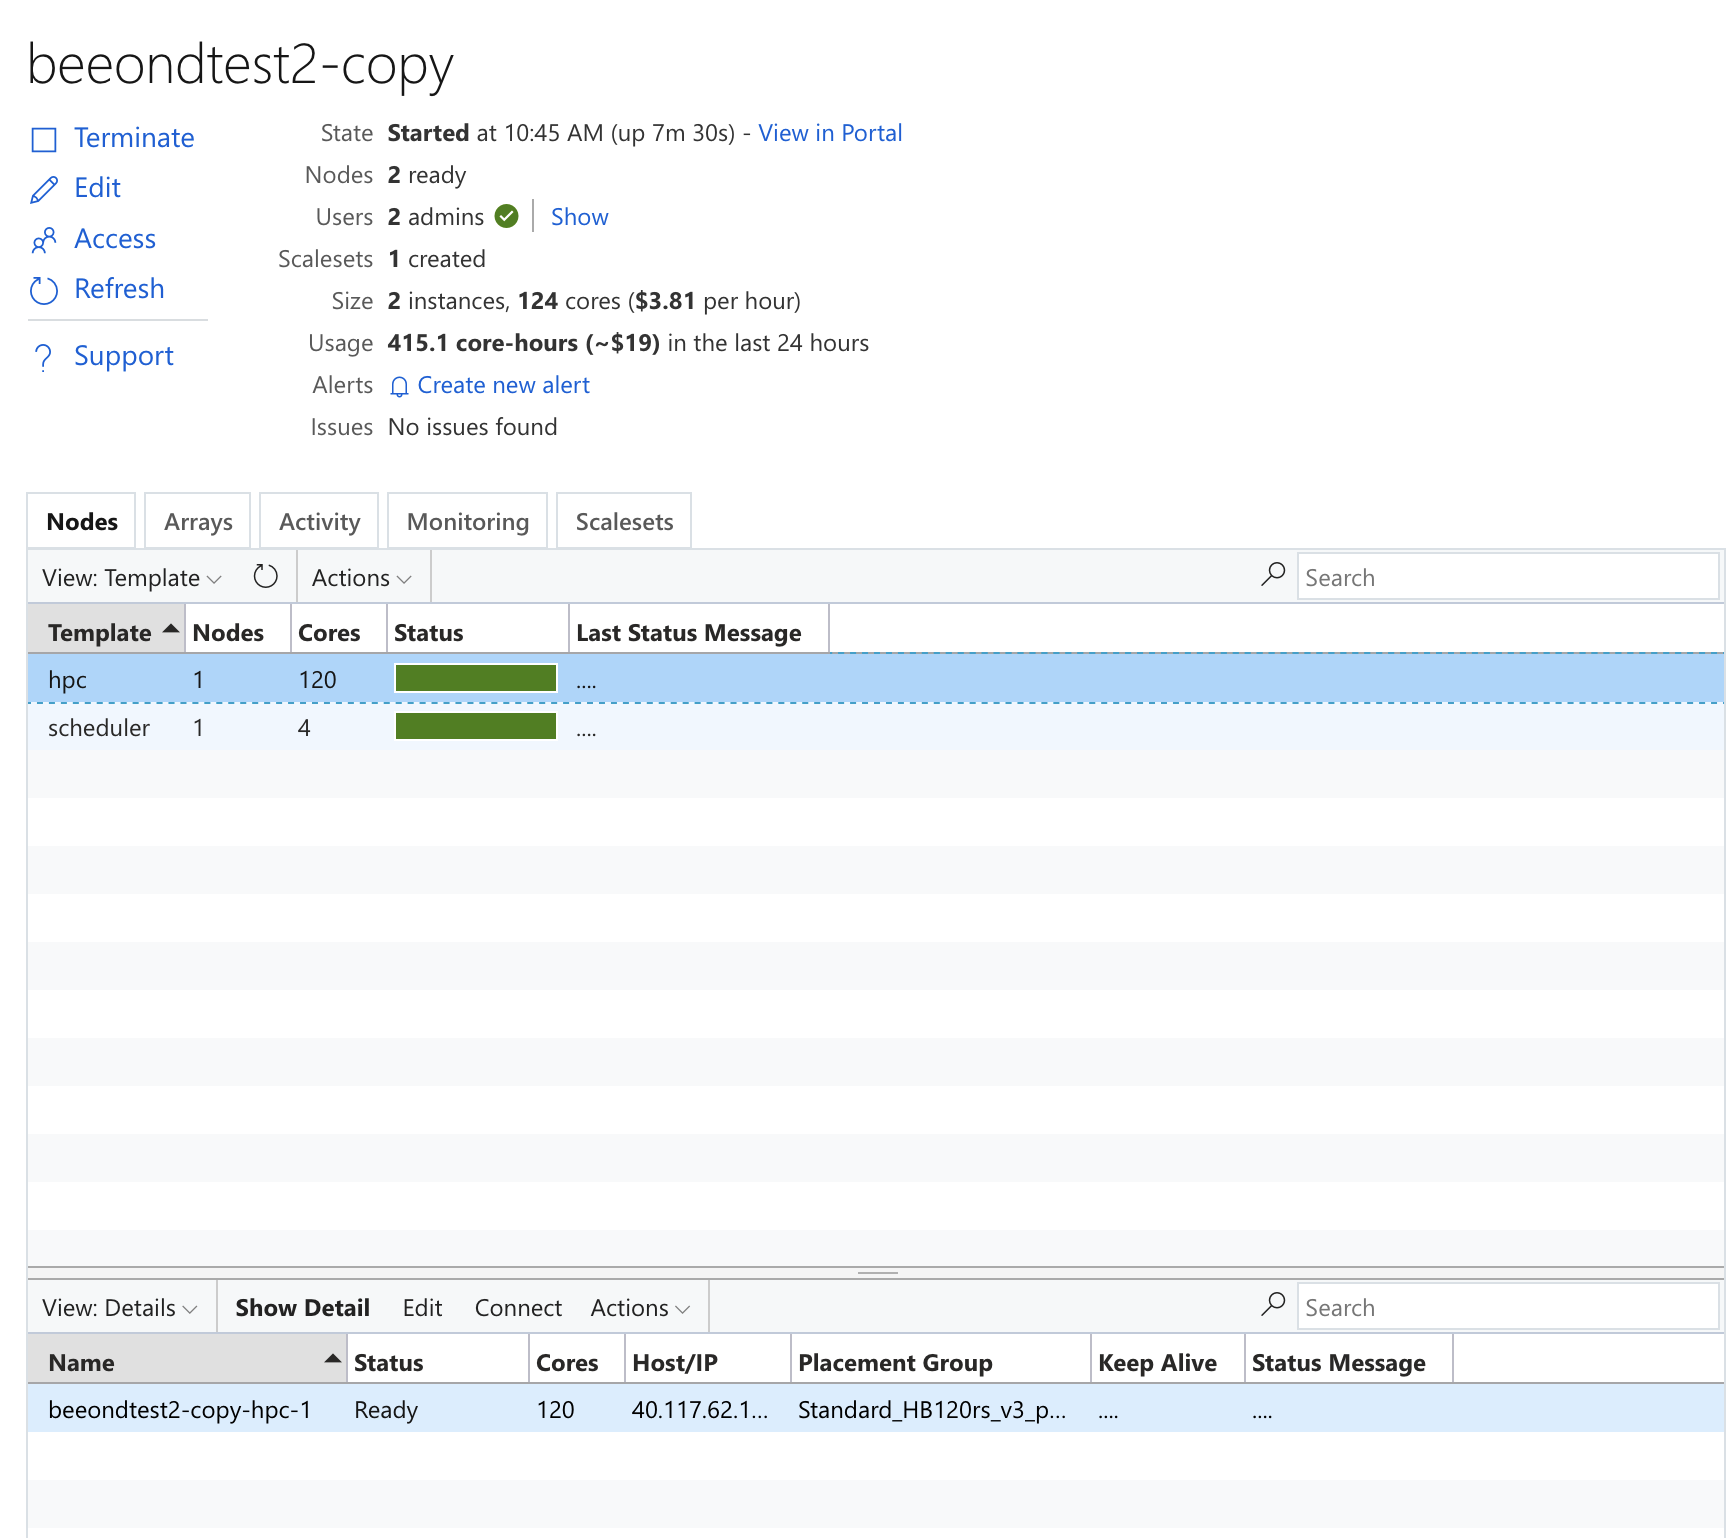
Figure 32. Azure Cycle Cloud Showing usage of Scheduler Node and Compute Nodes for Srun command
4.1.4. Instructions to upgrade the number of processors available to the Cycle Cloud Cluster (only needed if you want to modify the number of nodes in the HPC queue)#
Edit the HPC config in the cyclecloud web interface to set the CPUs to 600 Run the following on the scheduler node the changes should get picked up:
cd /opt/cycle/slurm
sudo ./cyclecloud_slurm.sh scale